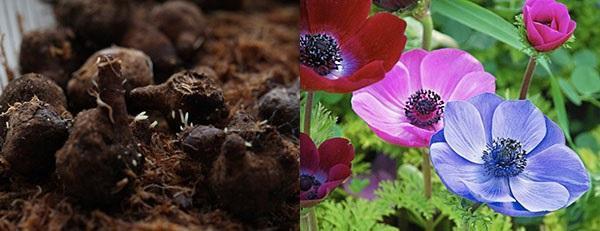
Anemone crown: features of planting tubers
 Although the genus of culture has about 120-150 varieties, they are all divided into two groups: tuberous and rhizome. The most common is still the crown anemone, which amazes with its variety of shapes and colors.
Buyer Tips
When purchasing a plant, it is important to carefully consider it. There is a lot of controversy over size. Little ones are not always bad. It all depends on the variety. Next, growers study the condition of the bulbs. They should be free of mold and insects. Moreover, before buying, the designations on the packaging are decoded. Most often there are indicated:
- diameter of tubers;
- flowering period;
- approximate growth of culture.
The letter "A" in the right corner indicates that the product has been treated for Alternaria. This is a separate group of diseases that cause fungal spores. If there is such a designation, the tubers do not need to be pickled. On the centerfold, all the details of the landing are also painted. When to plant, to what depth (up to 5 cm) and with what step (10 cm). A separate icon will show you which place to choose in the flowerbed: in the shade or in the sun.
They buy planting material in the fall. Then they send it to the refrigerator for the winter. At the same time, they look so that there is no moisture there. If flowers are purchased in spring, then they are immediately planted in the ground.
Crown anemone ready for planting
The tubers are pre-soaked. They take a container, put cotton wool on the bottom, moisten it with water and place the product there. A few drops of root or other fertilizers... Some do not advise using a growth stimulant so as not to overdo it, otherwise the culture will stop developing. The container is closed with a lid and the tubers are left to swell completely. Then determine where they have the top and bottom. Further:
- the specimens are seated in separate pots, because the crown anemone does not tolerate transplants (the roots are too intertwined);
- several holes are made at the bottom so that excess moisture does not collect;
- fill the pot with soil;
- put so that the stem looks up, and then watered;
- at the end sprinkle with earth.
It is advised to cover the bottom of the pot with paper. It allows water to pass through, but does not allow the root system to grow strongly and goes beyond the container.
As soon as the sprouts hatch, they are advised to cover them again with a thin layer of soil. Enterprising gardeners make mini greenhouses for their seedlings to maintain a humid microclimate:
- a six-liter bottle is cut lengthwise, but only halfway to form a lid;
- cover the bottom with coconut substrate with sawdust (2-3 cm);
- place containers in the middle and cover.
As a result, excess moisture will drain and settle to the bottom of the homemade greenhouse. At the same time, the plant will not suffer from water shortages. Still, you need to try to maintain the air temperature + 16 ° C.
In favor of the separate planting of crown anemones, it is worth adding that if a sick tuber comes across, it will not be able to infect all the rest of the seedlings. But removing it from a common pot is problematic. By the end of May, healthy specimens are transferred to the site.