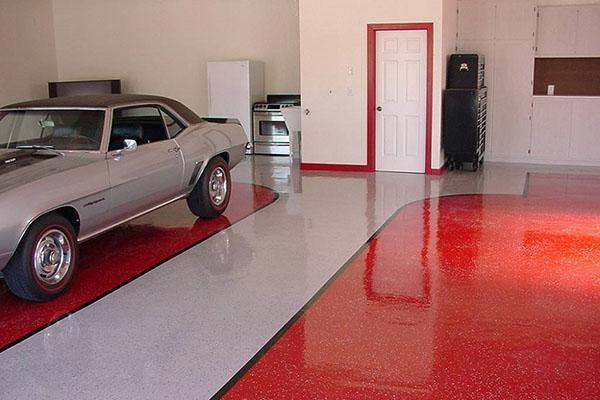
We do the floor in the garage with our own hands
 The floor in the garage is daily exposed to serious loads: pressure due to the large mass of the "iron horse", shock loads, friction, the influence of aggressive fuels and lubricants, exposure to moisture and temperature extremes. The wrong choice of construction and materials of the floor covering can significantly reduce its service life and subsequently complicate the operation of the garage. In this publication, practical recommendations will be given on competently arranging the floor in the garage with your own hands, the advantages and disadvantages of various design solutions and coating materials will be investigated.
Garage floor: basic coverage requirements

A competent garage flooring must have the following characteristics:
- strength;
- wear resistance.
- low dust formation;
- resistance to mechanical and chemical influences;
- fire safety.
Thanks to a wide range of building and finishing materials, any car owner can create just such a garage floor that will best meet his requirements in terms of strength characteristics, design, and financial investments.
Variants and design solutions

The most common types of arrangement of the support surface in garage premises include:
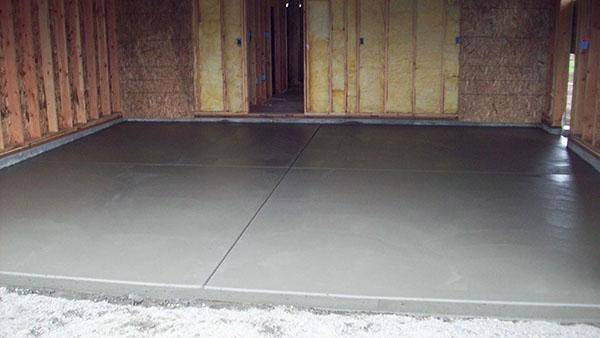
- Concrete screed.
- Earthen floor.
- Bulk cover from sand, screening, crushed stone.
- Wooden floor from a grooved board.
- Asphalt pavement.
The floor in the garage made of floor slabs, which has excellent strength characteristics, high wear resistance and fire safety, is very popular among car owners. An important advantage of such a coating is quick installation, and the ability to use immediately after installation.
Stages of creation, advantages and disadvantages
To make the right decision on the choice of construction for arranging the floor in the garage, you need to carefully weigh the pros and cons of each type of flooring and coating materials. Consider the most popular manufacturing options for this design.
Earthen floor

As a rule, the ground surface is considered by garage owners exclusively as a temporary floor.
Arrangement of the earthen floor is done in two stages:
- After construction foundation and pouring the basement, the fertile soil layer and all vegetation are removed.
- The interior of the garage is carefully leveled and rammed.
Advantages:
- profitability;
- ease of arrangement.
Disadvantages:
- low strength;
- high dust emission;
- lack of waterproofing.
- there is no possibility of insulation.
Experts recommend:
- After compaction of the soil, the interior of the building should be covered with a layer of clay, 100 mm thick, which must be carefully compacted. This process significantly increases the strength and waterproofing characteristics of the coating.
- Screening can be used instead of clay. With good ramming, the dropout floor in the garage will have good strength, moisture will not accumulate on its surface.
The "reverse side of the coin" of such a coating is high dust formation, cold surface, and the possibility of freezing.
Wood flooring

Wooden garage floors are not the most popular type of flooring. And there are a number of reasons for this:
- low strength;
- fire hazard;
- short service life (on average 5 years);
The advantages of such a flooring include:
- environmental friendliness;
- high maintainability.
- availability of thermal insulation measures;
- the possibility of creating a viewing hole or cellar.
Making a wooden floor in a garage with your own hands is very simple:
- The base of the earthen floor is created (as described above).
- A layer of waterproofing is laid. Roofing material can be used with an overlap of at least 50 mm between strips.
- Logs from a bar are exposed.
- The necessary layer of thermal insulation is laid between the lags.
- The entire floor area is covered with a vapor barrier membrane.
- A grooved floorboard is laid on the logs, impregnated with a mineral anti-rotting agent and fire protection.
The distance between the joists in the garage depends on the thickness of the lumber used for the final flooring. The thickness of the board is 20 mm - the distance between the lags is 30 cm, the section of the support is 5x15 cm (per edge); the thickness of the board is 40 mm, the permissible distance between the elements is 50 cm, the thickness of the log is 10x10 cm.  Support rails can be installed on poles not connected to the foundation or on beams fixed to the foundation.
Only a plank can be used as a finishing wooden floor.
Particleboard, plywood and similar materials will not be strong enough to transfer loads to the supporting structure. It is also not recommended to use the timber as an earthen floor covering. A garage floor made of timber will significantly increase the cost and weight of the coating, and will also require additional measures to strengthen the supporting structure.
Asphalt crumb
 Asphalt gum (crumb) is one of the inexpensive and widespread materials for processing old asphalt pavement removed during the replacement (repair) of the roadway. Composition: fine crushed stone and bitumen.
The asphalt crumb floor in the garage has the following advantages:
- Budgetary cost. Average price per 1 m3 varies from 10 to 14 conventional units.
- Relatively light weight. Depending on the composition, the mass is 1 m3 varies from 1.5 to 1.8 tons.
- Easy to lay.
- Long service life with strict adherence to laying technology.
- Resistance to mechanical stress and temperature changes.
The disadvantages of creating such a coating in a garage are:
- Harmful bitumen fumes when the room temperature rises.
- The need for periodic repairs.
- The use of special equipment.
How to make a garage floor from asphalt chips? The technology for creating such a surface fits into four stages:
- We create the base. Vegetation and debris are removed and the ground is leveled and compacted. A layer of rubble should be poured onto the ground, which must be leveled and carefully tamped. A gravel subfloor in your garage will significantly increase traction.
- The prepared surface (earth, crushed stone, sand) is primed with a bitumen emulsion. Average consumption - 1 l / m2.
- The surface is covered with a layer of asphalt chips and carefully compacted.
- The tamped surface of the garage floor is impregnated with a bitumen emulsion. Average consumption - 0.5 l / m2.
Tamping of asphalt crumb requires special equipment! The compaction coefficient of this material reaches two units, which must be taken into account when ordering asphalt granulate.
Paving slabs
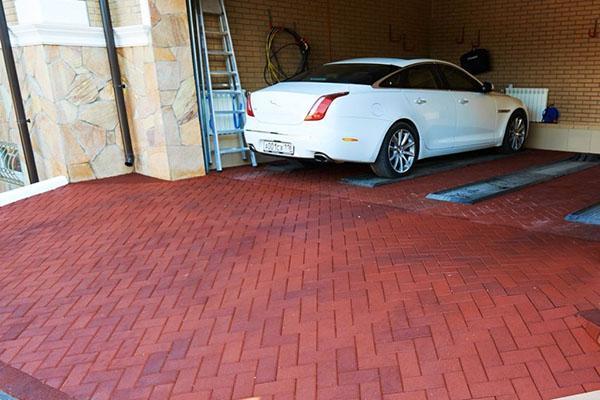
 Paving slabs in the garage are an excellent alternative to gravel, sand or screenings, earthen floors, and wood flooring.
Experts say that paving slabs in a garage are significantly superior to a concrete screed in a number of characteristics:
- Decorativeness.
- High strength. With proper preparation of the base and adherence to the laying technology, the tiles perfectly tolerate shock and unevenly distributed loads.
- Moisture resistance.In the production of this material, it contains chemical reagents that increase plasticity and prevent moisture from penetrating into the tile structure.
- Resistant to aggressive liquids.
- Resistant to temperature extremes. According to most manufacturers, paving slabs do not lose their physical qualities in the temperature range from -40 ° С to + 60 ° С.
High-quality paving slabs have high wear resistance and practically do not form dust, unlike concrete pavements.
The easiest way to install tiles in a garage is on a sand cushion.
Stages of work:
- Calculations. Tile thickness - 80 mm; a layer of sand-cement mixture - 100 mm. if the weight of the car is more than 1.5 tons, then a layer of crushed stone of 100 mm should be added.
- Based on the calculations, a certain layer of the earth is removed.
- The surface is compacted.
- A layer of crushed stone of the required thickness is poured and carefully rammed.
- A sand cushion is poured from sifted fine sand. The sandy surface is leveled, spilled with water and compacted.
- A layer of sand-cement mixture is poured onto the compacted sandy surface in a ratio of 4: 1 and carefully leveled.
The tile is laid from the far corner, observing a gap between the elements of 3-5 mm. A rubber mallet is used to level the surface horizontally. After the completion of the laying process, the sand-cement mixture is poured into the gaps between the tiles until it is completely filled.
Porcelain stoneware tiles in the garage

The floor in the garage made of porcelain stoneware has many advantages:
- high strength up to 200 kg / cm2.
- resistance to physical stress and shock.
- moisture resistance.
- long service life.
- ease of care.
- low coefficient of deformation at temperature drops.
Most owners note anti-slip effect and high resistance to aggressive liquids.
The disadvantages of porcelain stoneware tiles include the high cost and fragility of the material during installation.
To independently create a porcelain stoneware floor in the garage, you need to perform a number of works in the following sequence:
- Leveling and compacting the rough base. The most effective way is to pour concrete screed. The surface must be dry and completely flat.
- Laying the tiles on a special adhesive, which is evenly applied to each element with a notched trowel.
Period of complete drying of the glue - 24 hours. Only after the complete "formation of the tile" can you start grouting.
What to make a floor in a garage, what is better to use as a floor covering, what structure to use in practice? In this publication, methods of self-construction were presented and the main advantages and disadvantages of each option for its creation were considered. Which method to choose depends on your preferences and financial capabilities. The main thing is strict adherence to technology and the choice of quality materials.