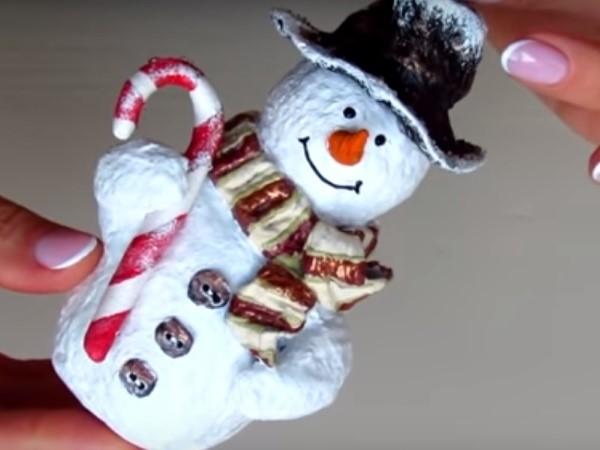
Christmas tree toy Snowman from papier-mache - master class
 The New Year is just around the corner and you can think about what you will hang on the tree. The Christmas tree toy Snowman made of papier-mâché will become a beautiful decoration of a forest beauty. And what is most interesting is that you will spend almost nothing on its purchase. Love to paint and have acrylic paints at home, and there is always foil in the kitchen. Then feel free to start manual work, embodying your fantasies.
What to make a toy from
In order to make the frame of a snowman and decorate it, we need the following materials and tools:
- food foil;
- glue gun;
- PVA glue;
- paper;
- toothpick;
- paint brush;
- a piece of soft wire;
- acrylic paints;
- acrylic matt varnish.
If you plan to make a large snowman, for example, to put under the tree, you can use regular newspaper instead of foil. Make the main frame out of it, and wrap a layer of foil on top.
Making a snowman
The first step is to start forming the frame. To do this, make 3 balls from foil. One should be of a larger diameter - this will be the lower torso. The other two balls are about half the size - this is the top. And one needs to be flattened - this will be the neck on which we will hang the scarf.
You will also need 3 sausages. One is relatively thin and long - for the candy that the snowman will hold in his hands. Smoothly bend the tops of the stick. The other two are short and plump, bent at the edges in the form of a crescent. These are future pens. We glue the finished balls together with a glue gun.
Now we knead the mass of papier-mâché, based on the approximate proportion:
- 250 g of glue;
- 40 g paper.
To make the mass white, it is better to take paper napkins. As a last resort, toilet paper is also fine.
We glue the foil balls with the finished mass, connecting them in the course of the action with PVA glue, smearing with a brush. Do not forget to glue the handles, also smearing them with papier-mâché. We make a scarf from the same mass: we roll a thin sausage and flatten it. We "put on" the scarf, beautifully laying it around the head and forming the ends. Pressing down on a toothpick, create a knit effect, leaving vertical stripes around the circle of the scarf.
To smooth the seams, we moisten our fingers in plain water and smooth them.
It remains only to make a nose and buttons from papier-mâché, glue them, and the frame is ready. We leave it in a warm place for a day to dry.
Papier-mâché snowman Christmas toy: how to decorate
When the frame of the snowman is completely dry, we proceed to decorate and paint it:
- Making a hat. We first bend a small loop out of the wire - you need to insert it into the hat so that you can hang the toy. We make the hat itself from the same foil, inserting a wire into it with a loop from above. We glue the hat to the head with a pistol. We glue the surface of the cap with several layers of napkins - this will strengthen it and make it possible to paint.
- When the hat is dry, start painting the snowman. The headdress can be made black, the scarf can be made beige and the buttons brown. However, everything depends only on desire. Perhaps only the nose will remain unchanged - the color of a ripe orange carrot.
- Don't forget to paint and glue the lollipop.
The final touch is to paint the snowman itself white and draw a peephole. We cover the finished toy with varnish.Now the papier-mâché Christmas tree toy is ready and very soon it will be possible to hang it on the tree.