How difficult is it to build a garage from corrugated board with your own hands
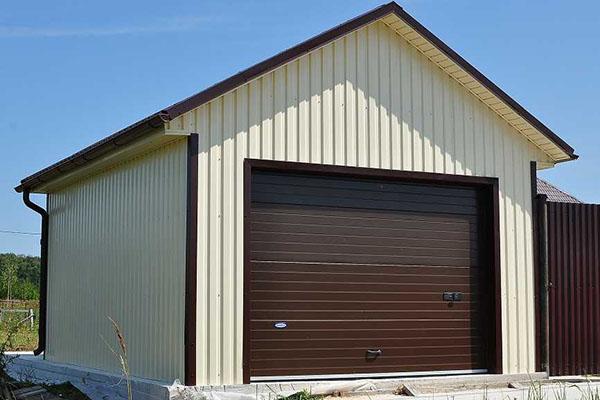
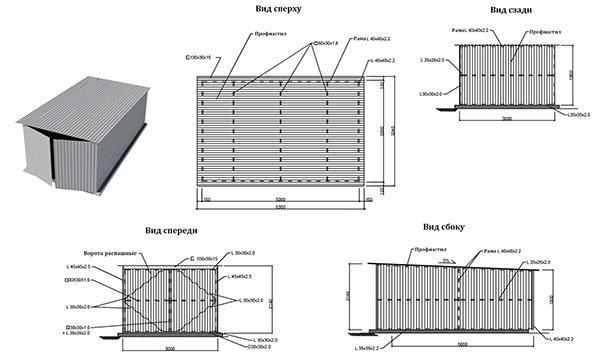
 A shelter for your car can be built relatively quickly, and most importantly, inexpensively. A garage made of corrugated board is assembled on average in one week, even if it is installed on a capital foundation. The first thing to do is to draw a diagram of the future building.
Garage layout

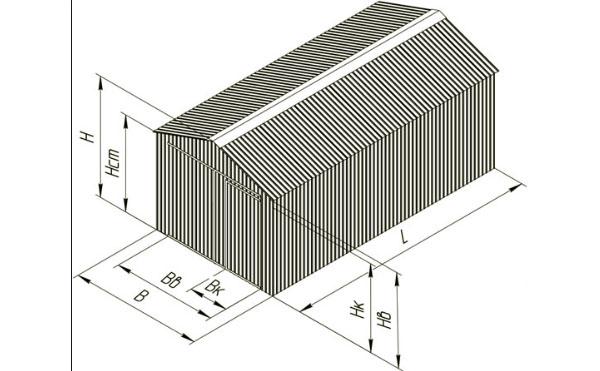
 When drawing up a drawing, the dimensions of the future structure will depend on the size of your car. Add one meter to each side (length, width). If a place for some equipment is planned in the back of the garage, then the length should be increased accordingly. When a place for two cars is planned, then the size between the cars should be left 0.6-0.8 meters. The optimal height is 2.6 m, with a more economical option, make a height of at least 2.2 m.
 The roof on light and low buildings is quite suitable for a pitched roof. In regions with heavy snowfall, you can make a gable roof, it will cost more. But the gable trusses will reliably protect the roof of the garage made of corrugated board from the mass of snow, from deformations and from possible collapse.
The higher the ridge of the gable roof, the greater the cost of the project. However, such a roof is more reliable, since less stress is created from the snow, which puts pressure on the trusses and on the garage walls.
The foundation for a garage from a profiled sheet

When building garages, two types of foundations are most often used:
- Tape.
- Monolithic.
The first option is most suitable for non-heaving soils that drain water well. Having made a monolithic slab, you can kill two birds with one stone: get a solid foundation, immediately pour a flat floor, and then cover it with something.
Do-it-yourself construction of a foundation for a garage from a professional sheet begins with a marking. On the marked area, dig a depression along the perimeter up to 50 cm deep. Pour 10 cm of crushed stone to the bottom and tamp it thoroughly. After the crushed stone, sand should be poured, a layer should be spilled with water and also tamped. The formwork should be done 10-15 cm above the ground level. To strengthen the mortar and to build the future skeleton of the garage, pipes are laid along the perimeter of the foundation.
For greater strength, reinforcement can be driven into the monolith before pouring, in increments of 1 meter, tie it by welding reinforcement of a smaller diameter. Pipes around the perimeter will be 10-15 cm outlets (support racks are attached to them), for subsequent attachment of the garage frame to them. The pitch between the pipes will depend on the size of the future structure. The corners and fittings for the gates are made of welded pipes or a channel of at least 50 mm.
If the plans include a device for an inspection pit, then in advance it is necessary to dig a recess under it and make a formwork along the edges of the pit.
Assembling the frame
 It will take two to three weeks until the solution completely solidifies, but after two or three days you can assemble the skeleton of the structure. To do this, you will need to prepare the following tools and materials:
- metal corner 80 mm;
- angle grinder - "grinder";
- welding machine;
- canopy loops (order from a turner with balls);
- screwdriver.
You will need to stock up, of course, with profiled sheets, self-tapping screws, and also buy insulation.When buying corrugated board, you should know that the higher the wave of the sheet, the more load 1 sq. m roof. For roofing garage structures, use sheets marked K 18 and K 20. The numbers mean the wave height, and the letter "K" means "roofing". For walls, the markings will be with the letter "C". The thickness of the profiled sheet varies from 0.4 to 1.0 mm, it also depends on the marking. There is a load-bearing corrugated board, it is designated by the letter "H" or "NS" - this is for load-bearing walls.
Having measured the height, first with a grinder, cut a corner for the support posts, which are then welded to the pipe outlets. After installing the corners, cut the crossbars to them. For crossbars, you can use a smaller corner, pipes. Weld the horizontal braces from the 80 mm corner to the vertical posts from above. These puffs will form the basis of the roof. Depending on the height of the ridge, weld either one vertical stand (per ridge) to the center of the tightening, or two struts, which will hold the rafters. Weld the crate to the rafters, on which to lay the profiled sheet.
How to sheathe a garage with a professional sheet
 Fasten the sheets of corrugated board from the upper corner, where to screw one self-tapping screw, then align and press firmly against the rack. Use self-tapping screws with rubber washers, they will not allow the screws to be overtightened, and also exclude the possibility of twisting and stripping the thread on the self-tapping screw. However, do not forget to set small turns on the screwdriver, intended for screwing in, and not for drilling.
When buying material in a hardware store, you can pre-order cutting of corrugated board for garage walls.
On the walls, first fasten the sheet only on one side, with release in one wave. Put the next one on the previous one and screw it to the frame at the junction. After sheathing the walls of the garage with corrugated board, proceed to the roof. Prepare gutters and protective wind bars.
The roof of the garage from corrugated board begins to be covered after the installation of hooks for gutters. Wind (end) strips should also be fastened before covering the sheets. You can install a "drip", but a tightly fixed drain will be enough. The end plate, like the "ridge", can be made independently or ordered at a hardware store.
The roof of the garage is covered and fastened in the same way as walls, with the only difference that the work is carried out more accurately so as not to push through the sheets. The joints are fastened to each other in one wave, some roofers cover the overlap with bitumen mastic before this. The same can be done when fixing profiled sheets to walls.
When selecting self-tapping screws for mounting the profiled sheet on the roof. It is necessary to add another 35 mm to the wave size, since the screws are screwed into the comb. Self-tapping screws can be selected in a larger size, smaller is not recommended.
The corrugated ceiling in a garage with a pitched roof is closed from the outside with a corner. From the inside, the junction of the ceiling and walls is foamed with polyurethane foam.
For the device of the gate, it is required to make an opening from more durable parts. For this, a channel is suitable. The gates themselves are made of corners of the same size as the garage frame. The gates are assembled on the ground, stiffeners from sheets at the corners and awnings are welded. It is possible to sheathe and insulate the gate after installation in the garage opening.
Walls made of profiled sheet with insulation
 The corrugated board needs to be insulated, otherwise in winter the temperature inside will be lower than outside. There are three ways to insulate walls from a profiled sheet:
- mineral wool;
- Styrofoam or Styrofoam;
- foaming.
The latter option is popular. Indeed, unlike the first two, here it will not be necessary to make a crate for fastening the material. It's simple: the foamed polyurethane is firmly glued to the walls of the profiled sheet. But there is also a minus in this method: it requires special equipment and specialists, which means additional expenses. Therefore, it is worth considering in advance how to insulate the garage from corrugated board.
How to insulate a garage from corrugated board
 In the case of insulation with foam or mineral wool, sheathing is required. For mineral wool, first one crate frame is made, then insulation is laid, then another frame is made, on which the sheets are attached. The second layer is made for the ventilation gap, which will remove moisture from the insulation.
The polystyrene is attached inwardly to polyurethane foam or to a sealant. The lathing is made of a galvanized profile, insulation is inserted inside the slats.