How to learn how to burn wood
 Burning wood or pyrography is one of the oldest arts. Some of the first items to be decorated with burning were found in Peru. They date back to the 7th century BC. Ancient craftsmen received images with rods red-hot on a fire. Nowadays, there are more and more fans to decorate their life, and special devices have come to replace the twigs, with the help of which lines of different thickness and color saturation are applied to the tree.
Read also the article: Wood carving - lessons for beginners!
How to choose a burner
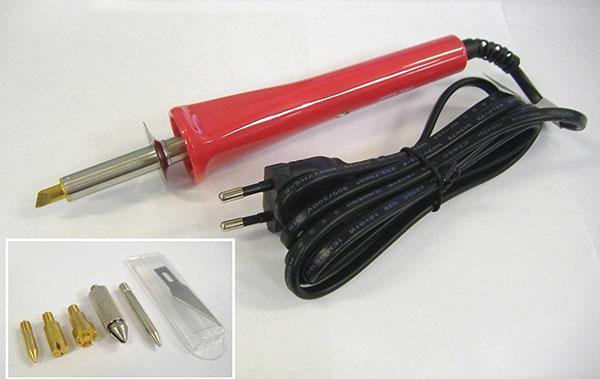
 You can even burn out a simple picture with an ordinary soldering iron. But for regular activities, it is better to buy a wood burner. It fits comfortably in the hand, has an optimal heating temperature and replaceable nozzles, which significantly expand the artistic capabilities of the master.
There are two types of burners - wire pen or hard nib. Both types are powered by 220 V, but samples with a solid pen do not have heating control. When choosing, you should pay attention to the power of the device.
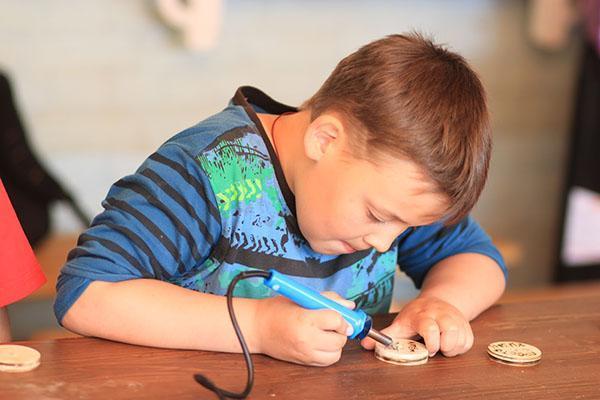
If the burner has less than 20 W of power, it will be quite slow to operate. Such devices are designed for children, or just learning the basics of burning.
More powerful devices allow you to work faster, but they are suitable for those who are already confident in their actions.
Advantages of hard pen burners
 These models are easy to use and inexpensive. With this type of scorcher, it is easy to apply simple images with a minimum of detail. They are most often bought for children or beginners. Among the disadvantages of the device are noted:
- long heating and cooling time;
- a handle warming up during operation;
- the large size of the handle and the feather far from it.
The latter feature makes it difficult to draw thin, long lines and requires breaks from work to rest. With prolonged use, the device may overheat and fail. Therefore, to burn out a large complex pattern, it is better to choose a different type of apparatus.
Features of wire pen instruments
 Samples of devices with a wire pen have great advantages:
- fast heating and cooling;
- comfortable handle;
- trouble-free replacement of the wire in case of its burnout;
- long service of the pen;
- the ability to draw lines of different thickness.
Such models are much more expensive, so they are usually chosen for professional woodworking.
For testing, it is better to purchase an inexpensive model with a hard nib. If you are serious about your lesson, there is a wide selection of wire pen wood burning appliances on sale.
How to choose a wood substrate and pattern for burning
 For work, choose the wood of linden, poplar, ash, maple, aspen, pine. These breeds are soft and easy to handle.
The softer the wood, the easier and more comfortable it is to work with it.
Before work, the board must be carefully processed. The smoother its surface, the neater the drawing looks. The planed board is sanded with fine sandpaper, passing along the fibers. This will remove minor irregularities and chips. In conclusion, it is wiped with a damp cloth from shavings and dust, so that it is easier to transfer the drawing.
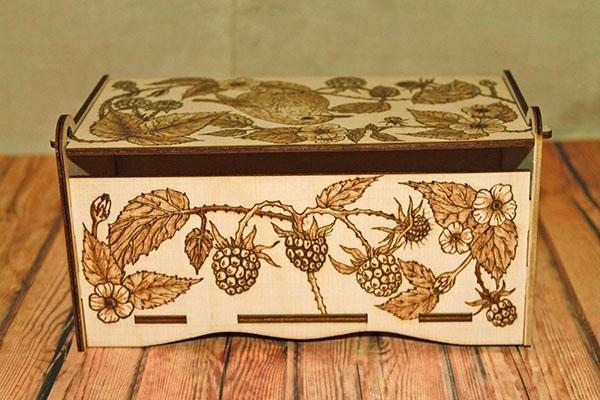
 Woodburning pictures for beginners should have clear outlines and little detail. Simple images are harder to mess up, there is always an opportunity to play with line width or add extra in case of error.
Burning themes can be any:
- congratulations on the holidays - such crafts will be a good gift;
- cartoon characters - drawings are simple and fascinating, children like to burn them;
- funny images of animals will decorate and revive the interior of a kitchen, hallway or nursery;
- landscapes look great in any setting;
- ornaments are always appropriate, they are easy to make using a stencil.
 The most difficult pattern for wood burning is photography. Here you will need high skill of the performer and a set of attachments to convey all the nuances.
Burning drawings can be downloaded from the network or made by yourself. To do this, a sheet of tracing paper is applied to the drawing and all the lines are carefully traced, trying to convey their thickness.
Children can draw the simplest pictures themselves. In this case, burning becomes much more interesting.
 Transfer the image to the board through carbon paper. It is fixed on the tree with the ink side down, tracing paper with a pattern is put on top and all the lines are translated, trying not to move the sheets in the process.
Useful tips for beginners
 For your first job to be successful, observe the following subtleties:
- use a burner to apply thin strokes instead of bold lines, so it is easier to direct the pen in the desired direction;
- press the pen with equal force on the entire surface of the board;
- the longer the pen is held in one place, the darker and deeper the line becomes;
- try to move the feather along the fiber of the tree, turning it with the fibers in you; when burning against or across the fibers, you need to apply more efforts;
- before work, practice on an unnecessary board with different attachments in order to fill your hand and have an idea of when they should be used;
- start burning from the edge of the sketch - this is the most invisible place in case of an error;
- run over the same place several times with light thin strokes, achieving optimal thickness;
- put a small board under your arm so as not to grease the translated sketch and not to stain the board;
- first burn the main lines of the image to see the basis of the composition.
Once you've learned how to draw precise, straight lines, experiment with shadows. Using this technique, you can achieve a three-dimensional image. Different attachments are used to display shadows.
The picture on the tree does not have to be monochrome. For coloring use watercolors (or pencils) and brushes.
The attachments must be periodically cleaned of carbon deposits. To do this, use a special sanding pad or belt and aluminum oxide.
The finished product is coated with varnish or PVA glue.
Safety compliance
 Teach children the safety rules for handling the burner and always follow them yourself:
- when changing attachments, use pliers so as not to burn your fingers;
- be careful when working with a heated burner;
- always place the device on a special stand;
- do not leave the switched on device unattended;
- use an exhaust fan when working in confined spaces, as some types of wood smoke heavily and can cause allergies and respiratory irritation.
Burning wood is a fun and rewarding activity. It will allow you to distract yourself after a hard day at work, teach children perseverance and accuracy and decorate your home with unique works.