How to make an incubator for hatching chicks with your own hands
 To breed chickens at home, you will either need to buy an industrial apparatus or make an incubator with your own hands. The second option is convenient in that it is possible to assemble a device of the required size and for the required number of eggs. In addition, cheap materials are used to create it, such as foam or plywood. All egg turning and temperature control work can be fully automated.
What you need to create a homemade incubator

To heat the air in a self-assembled incubator, incandescent lamps with a power of 25 to 100 W are most often used, depending on the size of the apparatus. Temperature control is carried out using an ordinary thermometer or an electronic thermostat with a sensor. In order to avoid stagnant air in the incubator, natural or forced ventilation is required. If the device is small, then it is enough just to make holes near the bottom and on the lid. For an incubator made with your own hands from a refrigerator, you will need to install fans, both from above and below. This is the only way to ensure the necessary air movement, as well as an even distribution of heat.
To ensure that the incubation process is not disturbed, you need to correctly calculate the number of trays. The distance between incandescent lamps and the tray must be at least 15 cm.
The same distance must be left between the other trays in a self-assembled incubator so that the air movement is free. Also, at least 4-5 cm should remain between them and the walls.
 Ventilation holes are made from 12 to 20 mm in size in the upper and lower parts of the incubator.
Before laying eggs, be sure to check if the fans are correctly positioned and if there is enough lamp power to evenly heat the incubator. This value should not exceed ± 0.5 ° C in each corner of the apparatus after full warming up.
How to make a Styrofoam incubator with your own hands
 Expanded polystyrene is one of the most popular materials for creating an incubator. It is not only affordable, but has excellent thermal insulation properties and low weight. For manufacturing, you need the following materials:
- foam sheets 2 pcs. with a thickness of 50 mm;
- scotch tape, glue;
- incandescent lamps 4 pcs. 25 W each and cartridges for them;
- fan (the one that is used to cool the computer is also suitable);
- thermostat;
- trays for eggs and 1 for water.
Before you start assembling an incubator with your own hands, you should draw up detailed dimensional drawings.
Step-by-step instruction:
- The expanded polystyrene sheet is cut into 4 equal parts.They will be used for the side walls of the enclosure.

- The second sheet of expanded polystyrene is first divided in half, and then one of the halves is divided into 2 parts. The width of one should be 60 cm, and the other 40 cm. Part of the sheet with a size of 40x50 cm will become the bottom, and 60x50 cm with a lid, due to which the homemade incubator will close tightly.

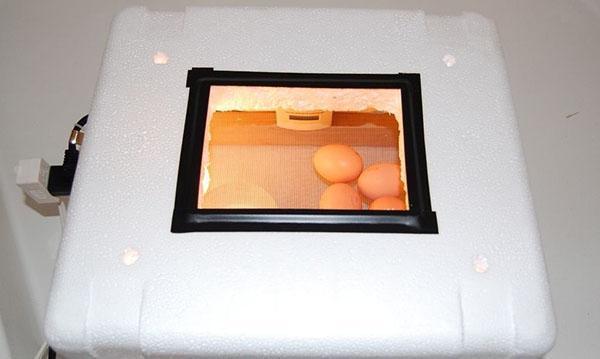
- A hole is cut in the cover for a viewing window with dimensions of 13x13 cm. It is also necessary for ventilation. It is closed with glass or transparent plastic.
- The frame is glued from the cuts of the first sheet for the side walls. After the glue hardens, the bottom is glued. The edges of the sheet (with a size of 40x50 cm) are greased with glue, and the sheet itself is inserted into the frame.

- After that, the box is pasted over with tape to improve its rigidity. First, the bottom is fitted with an overlap on the walls, and then all the walls.
- For air circulation and even heating, the egg tray should stand on two blocks. They are also cut out of foam. A width of 4 cm and a height of 6 cm is sufficient. Glued to the bottom along long walls (50 cm).
- In short walls (40 cm), 1 cm from the bottom, 3 ventilation holes are drilled at the same distance from each other, with a diameter of 12 mm. Expanded polystyrene is poorly cut with a knife, as it crumbles, so it is better to burn all holes with a soldering iron.
- To keep the lid firmly on the incubator, assembled with your own hands at home, polystyrene foam bars, 2x2 cm in size (maximum 3x3 cm), are glued along its edge. The distance from the bars to the edge of the sheet should be 5 cm so that they go inside the box and fit snugly against the walls.
- Next, you need to fix the bulb holders. They can be hung on strips of mesh.
- A thermostat is installed on the outside of the box cover. The sensor is mounted inside, approximately 1 cm from the eggs. A hole in the lid for it is pierced with a sharp awl.
- When installing the tray, you need to check that the distance between it and the walls is 4-5 cm, otherwise ventilation will be disturbed.

1 - a container for water; 2 - viewing window; 3 - tray; 4 - thermostat; 5 - thermostat sensor.
- If desired or necessary, a fan is installed, but in such a way that the air flow falls on the bulbs, and not on the eggs. Otherwise, they may dry out.
The heat inside the incubator, assembled from foam plastic with your own hands, will be retained even better if all walls, bottom and ceiling are covered with foil-clad thermal insulation.
Incubators with automatic or manual egg turning
To process incubation was successful, eggs must be constantly turned 180 °. But doing it manually takes a lot of time, and for this purpose, inversion mechanisms are used.
There are several types of these devices:
- movable mesh;
- roller rotation;
- tilt of the tray by 45 °.
 The first option is most often used in small incubators, for example, foam ones. The principle of operation is as follows: the net slowly moves from one side to the other, as a result, the eggs lying in its cells turn over. This process can be automated or manual. To do this, it is enough to attach a piece of wire to the net and bring it out. The disadvantage of this mechanism is that the egg can simply drag through and not turn over. Roller rotation is less commonly used in home-made incubators with automatic egg flipping, since it requires a lot of round parts and bushings to create it. The device works with rollers covered with a net (mosquito).
 To prevent the eggs from rolling, they are placed in the cells of the wooden lattice. When the tape starts to move, all the eggs turn over.
A pivoting mechanism that tilts the trays is used in larger incubators such as those made from a refrigerator. In addition, this method performs its task better than others, since in any case, each egg tilts. There are automatic egg turning trays.They come with an engine and a power supply. There are several smaller ones in one tray. Each one rotates separately after a time set by the user.
How to make a device for removing chicks from a refrigerator or plywood
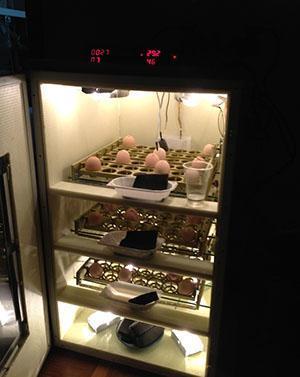
 Before you start making an incubator with your own hands, you need to draw up a drawing and a connection diagram for all elements. All shelves are pulled out of the refrigerator, including the freezer.
Step-by-step instruction:
- In the ceiling from the inside, holes are drilled for incandescent lamps and one through for ventilation.
- It is recommended to trim the walls of a homemade incubator from the refrigerator with sheets of expanded polystyrene, then it will retain heat in itself longer.
- Old shelf racks can be converted into trays or new ones can be put on them.
- A thermostat is mounted on the top outside of the refrigerator, and the sensor is installed inside.
- Closer to the bottom, at least 3 holes are drilled for air ventilation, measuring 1.5x1.5 cm.
- For better circulation, you can install 1 or 2 fans on the top near the lamps and the same on the bottom on the floor.
To make it easier to monitor the temperature and eggs, it is necessary to cut a hole in the door for a viewing window. Closed with glass or transparent plastic, the gaps are carefully coated with, for example, a sealant.
The video shows a DIY incubator from a refrigerator.
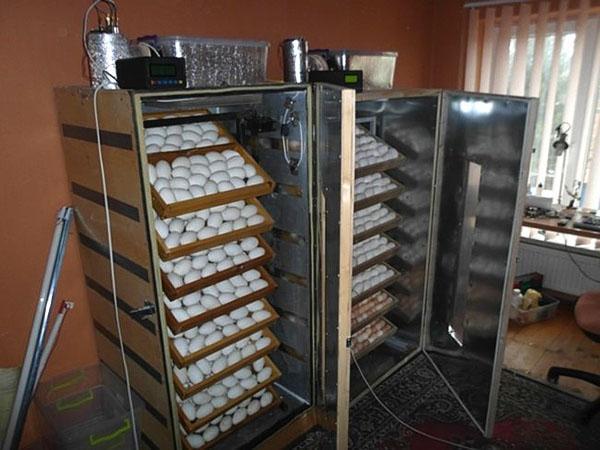
If there is no refrigerator, then the frame is made of wooden beams, and the walls are made of plywood. Moreover, they should be two-layer, and insulation is laid between them. Bulb holders are attached to the ceiling, bars are mounted in the middle of the two walls to install the tray. Another additional light is placed at the bottom for better water evaporation. The distance between it and the tray should be at least 15-17 cm. A viewing window with a sliding glass for ventilation is made in the cover. Closer to the floor, holes are drilled along the long walls for air circulation.
By the same principle, incubators are often made from TV cases for a small number of eggs. The process of turning eggs in them is most often carried out manually, as it takes a little time. Trays can be made from rounded battens. This incubator does not need fans, as it is ventilated every time the lid is opened to turn the eggs.
At the bottom of any incubator, a container with water is placed to create the optimal level of moisture required for eggs.
To hatch a very small batch of chicks (10 pieces), 2 inverted basins can be used. To do this, one of them is turned over to the second and from one edge they are fastened with a furniture canopy. The main thing is that they cannot move out of each other. A bulb holder is attached to the ceiling from the inside. Sand is poured at the bottom, which is covered with foil and hay. The foil should have many holes with a diameter of 3 mm so that moisture can pass through it. To adjust the temperature, a block with steps is used, which is inserted between the cans.
In order for the hatching of chicks in any incubator to occur at the same time, the eggs must be of the same size, and uniform heating of the entire space of the apparatus is also necessary.