How to make drip irrigation: simple bottle systems and hoses
 The gardener's harvest depends a lot on watering. Even with regular and balanced feeding without water, any plants will not only be unable to get enough of them, but will disappear altogether. It is easy to provide sufficient moisture with frequent watering, but what if this is not possible? After all, not everyone constantly lives on the plots, many summer residents visit there only on weekends, on days off from work. And here autonomous irrigation systems, in particular, drip irrigation, will come to the rescue. This is the ideal option to provide a metered water supply directly under the crops. In addition, it significantly reduces water consumption, because irrigation takes place locally and in small portions. You can buy them, or you can make them yourself. How to make drip irrigation? In general, it is not difficult. If you do not want to mess with pipes, you can adapt the usual plastic bottles... If you have the skills to work with some tools, it will turn out to make a good and simple home system from ordinary garden hoses.
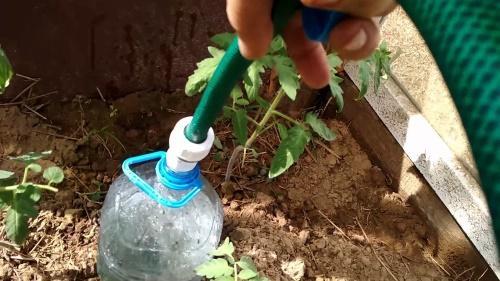
Drip irrigation from plastic bottles

Perhaps the only drawback of such irrigation is the more frequent filling of the system (bottle) with water. And you have to top up in each container, and not in the general tank.
How to make drip irrigation from a flexible garden hose - step by step instructions
 A wide range of automated irrigation systems are available on the market. However, they are unreasonably expensive for private plots, and they are unnecessary, since they do not cover the costs. It is much more profitable to do drip irrigation yourself, using hoses of different diameters. Despite its simplicity, it will be cheaper and will do its job well.
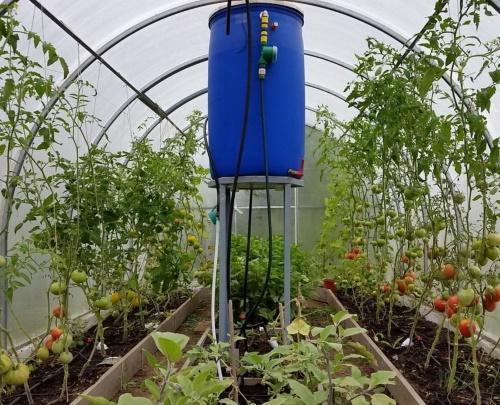
First of all, you need to decide on a storage tank that will provide the entire system with water. It can be a plastic barrel with an average capacity of about 100 liters. Its volume may be larger - it all depends on the area of irrigation, but you should not take a smaller tank. It must be installed at least 1 m above the ground level to ensure the water pressure. Make a hole in the bottom of the barrel to connect the tap and the central hose. It should be at least 5 cm above the bottom to prevent debris from entering the hose.
The barrels can be filled by connecting to the central water supply or by connecting to the downpipes. In the latter case, it is advisable to install a filter at the outlet, otherwise the system may become clogged with dirty rainwater.
Further installation is as follows:
- Install a tap on the barrel.
- Connect the central hose.
- Make through holes in it at the desired distances using a sharp drill and low speed. The diameter of such holes should be slightly smaller than the bends themselves.
- Prepare bends. To do this, cut thin flexible hoses with a diameter of no more than 4 mm into pieces of 30 cm or more. Fold them in half and cut a small hole at the fold (only on one of the walls). It should be completely in the center hose after connecting.
- Heat the central hose, dipping it into boiling water, and insert the bends into it, passing thin hoses through the through holes.
 It remains only to fill in the water and start the system by opening the tap on the barrel. And one more nuance that needs to be taken into account. If watering is organized in an open area, it is better to buy more expensive, but also weather-resistant hoses and pipes. They better tolerate the influence of sunlight, high and low temperatures. Accordingly, they will last longer. In large areas, it will also be advisable to connect a pump to supply water over long distances and maintain pressure in the pipes.