How to make a DIY seedling rack?
 To grow good seedlings, in addition to high-quality soil, timely watering, a sufficient amount of light is required. Lack of lighting will lead to the fact that the plants will start to hurt, growth and fruiting will be delayed. Well, of course, you need a place to place all the seedlings. Solve the placement problem and lighting
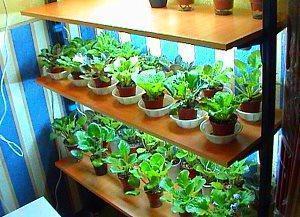
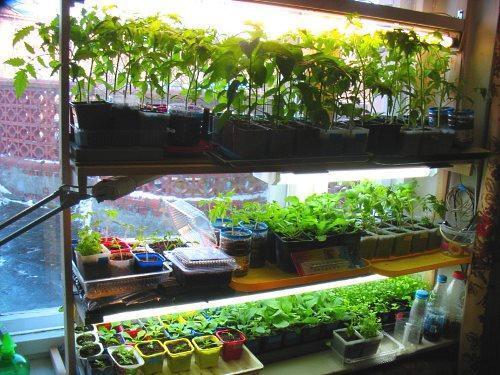
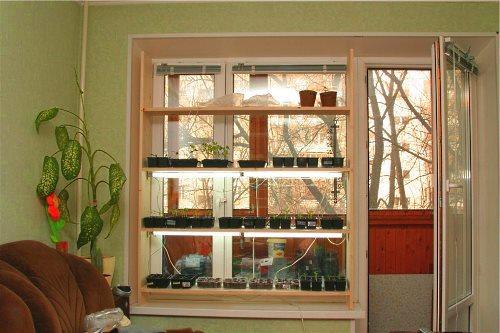
special racks will help. Ready-made seedling racks can be purchased at the store. And for those who want to show their imagination and creativity, you can make a stand for seedlings with your own hands, which will be combined with the home interior. You can not put it only on the windowsill, but also in the presence of lighting in any convenient place. Before the onset of cold weather, take out to the balcony or veranda.
The choice of material for the rack
What can be used to make a seedling rack?
First, let's decide on the material that we will use in the manufacture. It can be either wood, iron or plastic. It all depends on material capabilities and engineering and design wishes. If you prefer wood, then it is better to choose hard rocks that will not absorb moisture well. If metal, then stainless steel is better. It will protect the structure from corrosion. You can use plywood, plastic or plexiglass as shelves. Here, the preference is given to plexiglass and plastic. Such materials will last a long time without losing their appearance. The plywood shelves will have to be covered with polyethylene so that they do not deteriorate under the influence of moisture.
Basic requirements for a seedling rack
Whatever design the rack for growing seedlings has, it must meet the requirements:
- have strength, reliability;
- be resistant to moisture;
- with the expectation of repeated use;
- provide comfortable conditions for plants;
- quick access (watering, inspection, loosening);
- have an aesthetic appearance.

The number of shelves can vary from 3 to 6. The shelves must be long enough to accommodate standard fluorescent lamps. The shelf width should not be more than 60 cm with a shelf height of 40 - 50 cm.
We make a rack on the windowsill
Initially, having calculated the number of storeys of the rack (in our case there will be 4 of them) and its parameters, we proceed to construction. For simplicity and convenience, we take ready-made furniture boards in the size of the window sill, 1200 mm by 200 mm long. For the side racks, we install furniture boards with a length of 1500 x 200 mm. We fix it with the comfort. The shelf height in our case is 350 mm. If desired, for greater stability, the structure can be additionally fixed to the slope or frame. You can make a backlit seedling rack by attaching lighting to an already finished structure.

Why do seedlings need lighting?
 In winter, plants especially lack natural light. As a result, photosynthesis is sluggish, normal development and biomass growth slows down. The lack of light is compensated by installing artificial lighting. In stores, you can buy lamps of all kinds of designs, capacities. But how many lamps and what wattage are suitable for growing plants? First, let's decide which lamps are suitable for lighting.
Choosing the right lamp for seedlings
Suitable for the seedling illumination device:
- Incandescent lamps (17 lm / w) - a simple, affordable, but not the most effective way of lighting. They give little light, they heat very much.
- Fluorescent lamps (70 - 100 lm / W) type LBT or LB daytime running light with low power. Provide cool light. Have a low proportion of red light.
- LED (80 - 110 Lm / W) - durable, economical lamps. With them, it is easy to find the required spectrum, intensity.
- Sodium metal halide lamps (up to 100 lm / W) - easy to use, economical, effective, but they lack the blue spectrum.
- Domestic sodium gas discharge lamps (200 lumens per watt) emit a yellow-orange light that does not irritate the eyes. Requires additional installation of a regulating device.
- Mercury... They have the largest "cross section" in the field of daylight.
- Phytolamps - economical, environmentally friendly, efficient, compact and durable. Most popular for seedling lighting. Even close location of such lighting will not lead to leaf burns.
- Others: halogen (25 lm / W), linear (47 - 93 lm / W), xenon gas discharge lamps (100 lm / W), neodymium.
In order to illuminate a shelf 50 cm wide, 140 cm long, it will be enough to install a "warm" lamp and a "cold" lamp with a power of 36 watts. And it is best to fill the lack of sunlight with fluorescent lamps or special phytolamps. Reliable and efficient sodium discharge lamps will also help illuminate the seedling racks.
When choosing a lamp with chokes, take into account the strong heating of the choke and the shelf above it. To reduce heating, the gap between the shelf and the lamp is made 4 - 6 cm. If you use a lamp with electronic ballast, then there will be no heating problems.
Recommendations for organizing lighting
Regardless of the type of lighting chosen, try to place the seedlings on the south window. For greater effect, additional reflective screens can be installed on the sides and behind the seedlings. The intensity of the illumination is selected individually for each plant. Depending on the requirements of the plant, the intensity can be adjusted by increasing or decreasing the distance from the lamps to the plant.

Let's summarize
Having picked up the necessary material, calculating the parameters of the shelves, you can easily make a rack for seedlings with your own hands. Do not forget about the need for additional plant lighting.
Having decided on the choice of lamp (phytolamps, fluorescent, sodium are considered optimal), you can make a stand for seedlings with backlight.