How to install and operate a door closer
 Closers are often installed on the doors of the main and emergency exits for ease of operation. A door closer is a device that helps to smoothly open and close doors, and also brings the doors to a certain position. A correctly adjusted door closer will smoothly close the doors, even if they are left ajar. In addition, this device reduces the load on the door hardware, and also protects the hinges from early wear. At the same time, the door structure itself experiences less stress. In order for the door closer to bring the expected benefit from it, you should choose the right type of structure, the method of its fastening, correctly install it and take timely preventive measures to extend the life of this product.
Closer construction types

- waybills;
- outdoor;
- hidden.
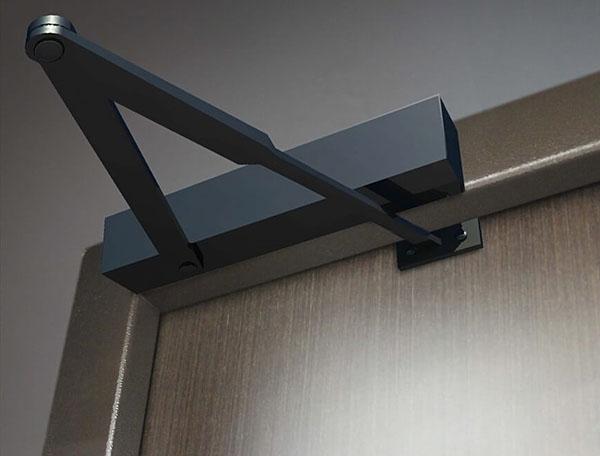
Overhead mechanisms are the most common, in addition, there is the possibility of installing this device at home. This mechanism is installed on a box beam or on a door leaf. The installation of such a door closer is also simple because manufacturers attach a template, a detailed description and instructions for fixing the product to such products, along with instructions. Thus, it is not difficult to install the closer yourself, and all fasteners are attached to the structure by the manufacturer.
Floor structures are a more aesthetic option than overhead ones, since they are hidden in the floor covering of the room and cannot be seen. However, planning for the installation of such structures must be done at design time, since the fasteners must be installed in the floor. It is very difficult to install such a structure yourself.
If the repair in the room has already been done, it is impossible to install this version of the closer.
Hidden devices are the least popular and most complex at the same time. In order to install such a door closer on the door with your own hands, without the help of the involved professionals, it is necessary to mill the door cavities. At home, it is almost impossible to do this accurately, besides, even the slightest traces of installation of the structure will be noticeable. When designing door installations, you can choose this method, however, for its implementation, it is necessary to involve specialists.
Mounting methods
 There are several ways to install an overhead door closer on your own:
- standard installation;
- top installation;
- parallel arrangement.
The most common installation is the default. Moreover, the working body is attached to the canvas, and the lever is attached to the lintel of the door frame. This installation method is the simplest.
When installed overhead, the mechanism is mounted on the lintel. In this case, the lever is attached directly to the door leaf. When the door closers are installed in parallel, the lever, as in the case of the standard installation, is attached to the lintel of the door frame, but not perpendicularly, but parallel. In this case, a special mounting bracket is used during installation.
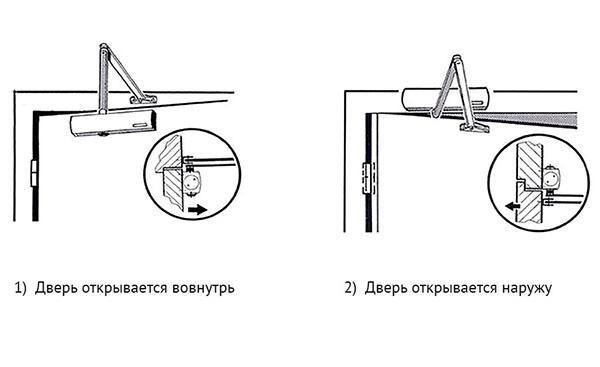
The closer installation scheme depends on the location of the hinges on the door.The movement of the door leaf when opening and closing the door determines the installation scheme.
If the door opens towards itself, then the device is mounted on the canvas, and the lever to the box. In the opposite case, the lever is attached to the canvas, and the upper fastening to the lintel.
How to install a door closer
 There is a certain algorithm, following which you can attach the closer, regardless of its type of attachment. The sequential execution of work looks like this:
- The place of attachment of the closer is determined. The template attached to the instructions for use and installation of the door closer is attached to the installation site and glued with tape for ease of use.
- The existing template shows the holes for the fasteners. There are only 6 of them: four for the closing device and two for attaching the lever. The installation locations of the fasteners are transferred from the template to the door.
- Then the mounting hole must be drilled. The lever is attached using the supplied fasteners.
- When its installation is completed, the door closer body is attached. When the device is fixed on the door, the closer rod is installed on the axle.
- The arm is then adjusted in length. It must be strictly perpendicular to the door leaf when closed.
All fasteners that must be used when installing this device are supplied by the manufacturer along with the closer itself.
It is not recommended to use other fasteners for installation, since the reliability of the structure will no longer be the same. Moreover, when installing a door closer, you should adhere to the scheme indicated by the manufacturer in the instructions. Only in this case can the door closer function be guaranteed.
After installation, the work of the closer must be adjusted. Adjustment is made after connecting the main working body and the rod into a single movable mechanism. Closer adjustment should be done last, after all installation procedures. This is done by adjusting the 2 screws by correcting their position. Each screw indicates the speed that the door closer will have in a certain range of door angle in relation to the plane of the wall. One screw adjusts the speed from 0 to 15 degrees, the other from 15 degrees to fully open the door. The movement speed is set by turning the screws.
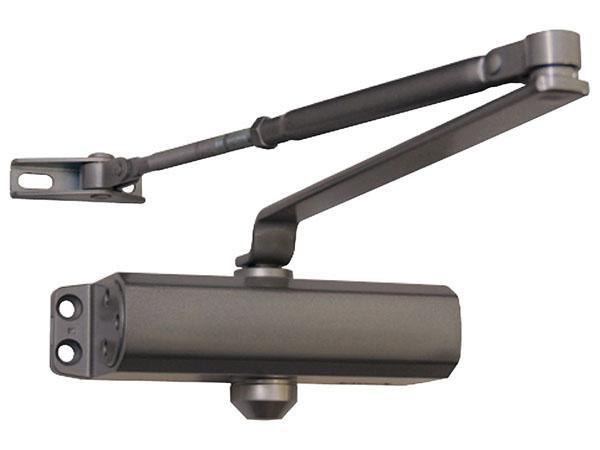
What the closer looks like can be seen in the drawing.
It is not recommended to do more than 1.5 turns, as it is possible to break the tightness of the position of the screws, which will lead to oil leakage.
Service
 No matter what door, plastic, metal or wooden, the door closer is installed in order for it to function correctly, it must be regularly serviced.
One of the main elements of the closer maintenance is the annual replacement of the grease, which is located in the joint of the 2 halves of the closer rod. It is sufficient to change this grease once a year. If the procedure occurs less frequently, the mechanism will wear out faster. Moreover, it is necessary to adjust the screws that indicate the closing speed twice a year. This must be done for two reasons:
- Firstly, due to temperature changes outside by more than 15 degrees, the screws can get upset. Thus, the speed of opening and closing the door is disturbed.
- Secondly, during operation, the screws can come, albeit in a slight, but still movement. The gradual turning of the screw, even by a few degrees, in six months can significantly change the speed of the door closer.
In order not to make adjustments too often, it is enough to do this 2 times a year. In early winter and early summer, when the temperature outside changes.
In order for the door closer to last longer, you cannot prop up a door that is equipped with a door closer so that it does not close.
This is usually done with a brick, stool or chair. If for some time it is necessary to make sure that the door does not close, but is open for a long time, it is necessary to disconnect the pull from the closer. In most of these devices, the thrust is detachable. Thus, the performance of the door closer will not be damaged.
As you can see from the information described in the article, self-installation of a door closer is possible with minimal construction or repair skills. To achieve the most favorable result in the shortest possible time, it is necessary to carry out all installation work in accordance with the instructions attached by the manufacturer to the closer. It is also important to carry out regular maintenance of the working mechanism.