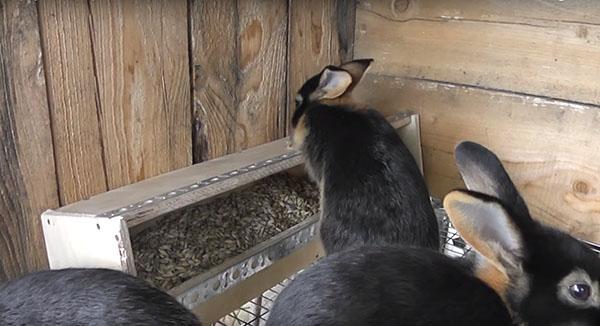
Diy feeder for young rabbits
 In the first month of life, it is very important to feed rabbits with high-quality compound feed. The correct rabbit feeder will help reduce its loss.
The feeder-box can be used both with a pit and a cage keeping rabbits... Its width depends on the size of the cage or pit. The box can be made of any material, but most often chipboard is used for its manufacture. Read about DIY rabbit cages.
Advantages and disadvantages of the design
The advantages of such a feeder include ease of assembly. It only takes 10 minutes to make a box. It can be crafted from available materials. In order to make a wooden feeder you will need:
- five boards of different heights;
- two side boards in the form of a trapezoid;
- hammer and nails.
Another advantage of the front opening design is the reduction of wasteful feed consumption. The main distinguishing feature of the trough-feeder from the trough-shaped trough is that the rabbits will not be able to rake out the granules from the box and get into it, so that all the feed will be used for its intended purpose.
The disadvantages of the feeder include the fact that the structure cannot be attached to the wall. To fill the box with feed, the trough must be turned over. If the feeder is intended for a small number of rabbits, then this disadvantage can be neglected.
In the event that you have a large number of rabbits, it is better to supplement the wide box with a hopper attachment for easy filling with feed. Such a nozzle can be made from plastic pipes.
Animals are actively gnawing, so you need to give them young tree branches.
To prevent rabbits from gnawing on a wooden feeder, tap the edges and ends with metal construction tape.
Wooden box assembly process
To assemble the trough, you will need four 10 mm thick boards of the same length. The height of the wooden rectangles is 10, 9, 7 and 5 cm, respectively. A metal tape can be nailed directly to a 10 cm board. The tape is also nailed to a rectangle 5 cm high.
A board with a height of 10 cm is nailed to a 7 cm high rectangle horizontally at right angles. In this case, the 7 cm rectangle is the back wall of the box.
On the other hand, a 9 cm high bar is nailed to the rear wall of the trough. The 5 cm high board will play the role of the partition. After the partition is fixed, the ends are nailed to the box.