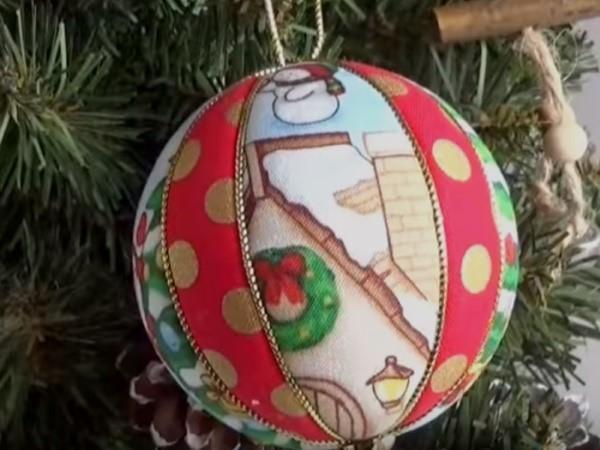
Beautiful DIY decorations - Christmas tree decorations using the kimekomi technique
 Kimekomi is the art of making products, when they are decorated with fabric rags, tucked into the slots on the blanks. If you think this is difficult, try making Christmas tree decorations using the kimekomi technique. This incomprehensible word is not at all so terrible and impossible. With a little patience, doing the work carefully and step by step, you will be pleasantly surprised by the results. Such decorations will not be ashamed to put up for sale, and not what to hang on the tree. We will no longer convince, but simply tell and teach everyone the Japanese art.
Materials for making toys
To make a beautiful kimekomi ball, you need to prepare:
- foam ball with a diameter of 7.5 cm;
- two pieces of fabric with different patterns, but matching with each other in colors;
- shiny lace in the color of the fabric;
- a small star or any other decor to cover the lower part where the fabrics join;
- tailor's pins;
- sewing threads (any);
- a pen;
- sharp clerical knife;
- paper;
- ruler or tailor's meter;
- scissors;
- glue stick;
- steamer (knitting device) or any other thin tool;
- glue gun.
Kimekomi Christmas tree toy: how to make
First, we make markings on the ball, along which we will further decorate it with fabric, and prepare template blanks. When everything is done, let's start decorating.
How to mark the ball
Insert a pin from opposite sides of the workpiece. We stretch a thread into one of them, fix (tie a knot). With even parallel lines, we divide the ball into sectors, twisting the thread by the opposite pin. It remains to draw the sector along the thread with a pen so that it can be removed.
To make the sectors the same, first divide the ball into 4 segments. We divide each of them into 2 more segments and so on. There can be as many sectors as you like, the main thing is to be able to decorate them beautifully with fabric.
It is better to draw with a marker, since the helium paste is erased during work.
Now, carefully with a sharp knife, we make cuts clearly along the drawn contours, deepening no more than 8 mm. Next, the widest part of the ball is measured, and its height. Using these dimensions, adding another 5 mm, we make a petal template on paper. Draw a rectangle, draw an arc, fold it 4 times and cut it out. The petal should be slightly larger than the segment. If the template is too wide or too long, you can trim it.
If your segments are not the same, templates need to be made for each of them.
We cut out fabric blanks according to the size of the templates, attach and circle them with a pen.
How to decorate
The templates and the ball are ready, let's proceed to the finishing part:
- We coat the segment with glue.
- We put a fabric petal on it.
- Using a ripper or other tool, carefully push the edges of the fabric into the slots in the ball. It is more convenient to do this from the widest place (middle) to the narrowest edge. We cut off the excess tops.
- We close the entire ball in turn, alternating multi-colored fabrics.
- We define the bottom of the toy, fix the end of the lace there and start wrapping the ball along the contours of the segments. We fix the lower points with a glue gun.
- We close the place where the stitches intersected with an asterisk at the bottom.
It remains only to attach at the top, passing under the laces, a loop made of the same material.Now our Christmas tree toy using the kimekomi technique is ready and will wait in the wings until the New Year holidays. As you can see, there is nothing complicated about this, so go for it and make supplies to decorate the Christmas tree.