Closed and open summer kitchen in a private house with your own hands
 Perhaps the main utility room in the courtyard is the summer kitchen in a private house. This building is used more often in the summer, but the closed-type version can be used in late autumn and early spring, and even in winter - if there is a stove. In such a kitchen, you can, without bothering anyone, rattle the dishes, smells will not penetrate into the house, with great comfort you can make preparations for the winter. In addition, almost in nature, you can relax with friends, especially if you have B-B-Q.
Summer kitchen in a private house: open or closed

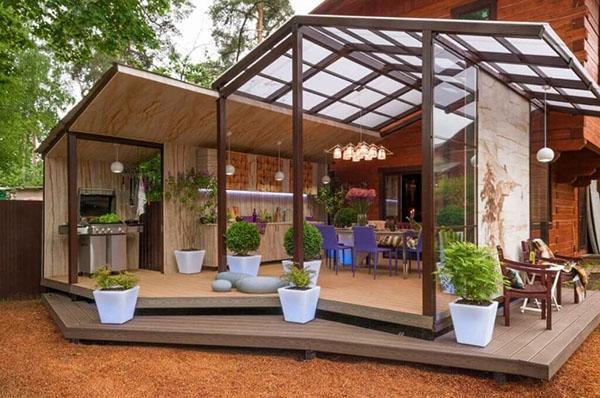
An interesting option is to combine a kitchen with a gazebo. In this case, the first is on the territory of the second. As if on the street, but as if under a roof.
Advantages and disadvantages of an open summer kitchen in a private house
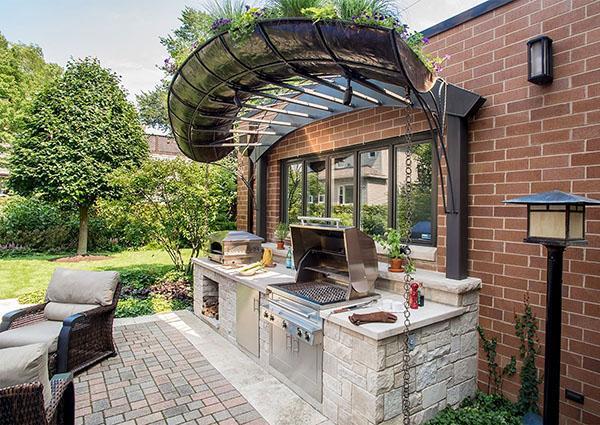
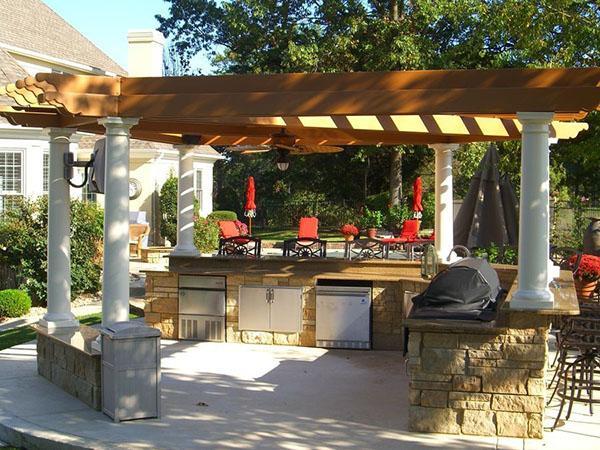
 Such a building is erected on a concrete base with a canopy roof on supports along the perimeter. A stove, table, benches or plastic chairs are required. Most often, building materials are: brick, wood or stone.
The advantages of a summer open kitchen include:
- the simplest technology with a minimum of calculations;
- low construction cost;
- construction speed.
Disadvantages:
- inability to use in cold weather;
- lack of protection from insects, wind and moisture;
- there is no guarantee of the safety of the products left.
In addition, for the winter, all filling (furniture, dishes, accessories) will have to be removed in a closed dry room.
Advantages and disadvantages of a summer closed kitchen
 This structure with a roof, walls, windows and a door can be considered a full-fledged small house. It can be combined with a cellar, veranda, sauna or workshop.
Since the kitchen is still summer, lightweight material is used for its construction and no insulation is made. The best option is a frame summer kitchen. It is quite budgetary and quickly erected. At the same time, it has many finishing options. A terrace or veranda can be attached to such a structure.
At the same time, it is possible to build a summer kitchen in the country and from foam blocks, brick or wood.
If in winter a private house is visited by short-term visits, then it makes sense to insulate the building and equip a sleeping place. Then the main house need not be heated.
Photos of projects of summer kitchens in the country are presented below.


The advantage of a closed design can be considered:
- reliable protection from insects and bad weather;
- safety of products and property;
- the ability to use as a guest house.
Disadvantages:
- more expensive than the open version;
- project creation;
- construction is more time consuming and laborious.
In addition, to build a closed-type summer kitchen, you may have to involve professionals. Since water and electricity will need to be supplied to it, it is better to locate a closed kitchen near the main house. An open building can be placed anywhere on the site. Better in a garden or near the water, away from the road and compost.
How to make an open type summer kitchen
There are quite a few ways to build a structure, but the following are always indispensable steps:
- markup;
- base device;
- installation of supports;
- roof installation;
- interior design.
 In the selected area, you should remove the sod, mark the perimeter of the future structure with pegs and select the soil to a depth of 20 cm.Then, you need to place reinforcement on the sand cushion, set the formwork and pour the concrete solution.
If communications are needed, then the pipes are laid before the concrete is poured.
After foundation it is poured under the summer kitchen with your own hands, you need to wait until it has completely hardened and start installing the support pillars.
 For light construction, a columnar brick base is also allowed. For this, a sand pillow should be made in pits 0.5 m deep, posts (made of brick and mortar), towering 30-40 cm above the ground level, should be laid. logs, floor boards.
 Later, it is better to put tiles or decking on it.
Between the posts and the timber, roofing material should be laid on bitumen as waterproofing.
Now you can start installing the support posts at the corners of the strapping using the L-shaped fasteners and anchor bolts.
In this case, the rear posts should be 20-30 cm lower than the front ones, so that the canopy has the necessary slope. Along the top, a bar is made similarly to the bottom strapping. At a height of 75 cm from the floor, horizontal wooden lintels should be made.
It remains to make a canopy roof by laying boards with a step of 0.5 m and slats on which to put slate or profiled sheet, not forgetting about waterproofing in the form of roofing material.
How to build a closed summer kitchen with your own hands
 Such structures are also quite diverse, but the most convenient and easy to carry out is a kitchen with a timber frame and a columnar foundation. It is better to choose OSB boards or lining as cladding. But before sheathe the walls of the summer kitchen, you need to make the frame itself.
To erect a frame building, you must first perform all the same steps as in the previous case, only add additional racks from a bar with a small step and sheathe them with the selected material. If desired, the structure can be insulated, for example, with mineral wool. In this case, the roof is made gable.
Summer kitchens from a bar
 For such a rather heavy structure, a more solid foundation, for example, a strip foundation, will be required.
To complete it, you should clear the place, make a markup according to the size of the future kitchen, create a formwork and a sand and gravel cushion, place reinforcement in it and pour concrete mortar.
Then, on the lower strapping, you need to lay the next rows of timber, fastening them together with a corner and self-tapping screws, until you get a deaf box in which cuts are made for the door and windows.
After the timber has shrunk, you can start building the roof. The upper bar will act as a Mauerlat.
 The rafters are attached to the Mauerlat with metal corners, the trusses are installed, the evenness of the ridge zone is checked and the ridge is mounted. Then the gables are sewn up, the crate is stuffed, waterproofing and roofing are laid.
Before that, you should determine the place for the pipe.
A veranda "asks" for such a capital structure.
How to build a summer kitchen with a veranda
 This is a good solution that allows you to combine the usefulness of the building in cold weather with the possibility of eating in the fresh air. The aesthetic purpose of the veranda is a smooth transition from the kitchen to the garden. Such a structure requires large windows or stained glass windows.
The veranda is made under the same roof and on a common foundation with the kitchen, as well as the above described options, they install supports and crossbars. The lower part can be sewn up, and the upper part can be glazed or left open in whole or in part.
If the veranda is open or semi-open, then a multifunctional brick oven can be built on it with a pipe outlet through the roof.
Registration

For any type, along with functionality, the design of a summer kitchen is also important:
- For the open version, light romantic-style curtains are suitable to hide from the sun's rays. Can be divided into work and dining areas.
- The kitchen-veranda with a pitched roof is equipped with large windows or solid glazing. Tiles on the floor, barbecue, barbecue or small oven. In the recreation area, wicker furniture and an abundance of pillows are appropriate.

- Kitchen gazebo. The brazier is easier to install where there are no walls - only supports. Bindweed can be planted around the perimeter, or openings can be partially sewn up.

- Closed kitchen. There is unlimited scope for imagination. You can choose any style, the main thing is not to overload a small room with accessories.

It is advisable to equip any kitchen with a sink, stove, refrigerator, work table, cupboards. Be sure to think over the original lighting and plant your favorite plants nearby.