The master's case is afraid - a metal door with his own hands
 A self-made metal door often surpasses many factory samples in both quality and reliability. After all, it is not for nothing that they say that a house is a small fortress, and the front door is a fortress gate. And it's hard to add anything to this. After all, if entrance doors are ordered on the market or in a supermarket, this is not a guarantee that the doors are of high quality and reliable. On the other hand, often the situation associated with the need to weld and install a temporary structure for the period of repair makes the idea of doing everything yourself quite real and relatively cheap.
Do-it-yourself metal door - from idea to practical implementation
Conventionally, the independent embodiment of the idea of folding a real metal entrance door from sets of metal pipes, plates and corners does not require much experience in plumbing. True, you must immediately admit that the metal door with your own hands will be assembled with certain difficulties. But with a thoughtful organization of work and the availability of a tool, many mistakes can not only be avoided, but also corrected in time.
The first step is to determine what kind of structure it will be:
- lightweight temporary construction until a real armored door is purchased;
- a structure that is planned to be built for a certain time as an entrance door to the corridor from the staircase;
- normal front door to an apartment or house with insulation and a reliable lock;
- a monumental structure for centuries with the firm confidence that the door will protect against any vandals.
Based on this, the forces, and the time, and the necessary materials are calculated. The whole process of work is planned from taking measurements to installing the outer and inner door trim. Conventionally, a door from a profile pipe with your own hands is created in several stages:
- the initial stage - taking measurements, preparing a drawing, selecting and ordering materials, preparing a tool;
- the stage of elaboration of individual units and connections, preparation of the slipway or assembly table for work;
- door block creation, door welding, fitting, installation of locking devices, installation of a metal sheet;
- installation of a door in a doorway, fixing, finishing;
- installation of cladding and internal filler, adjustment of systems.
This scheme of work, although it contains a large number of points, but with a phased implementation of their excellent result will be guaranteed.
Preparatory stage - where to get started
It is not hard to guess that a do-it-yourself iron door is created from metal pipes, corners, channels and sheet metal. But it is worth starting work with the organization of the workplace and the selection of tools for the job. It should be remembered that there are never enough tools. Having always learned to work with one tool, it turns out that it is more convenient to use several more tools for work. So for normal operation you need to prepare:
- metal ruler, scribe, tape measure, metal square, crayons;
- grinder with a set of cutting, cleaning and grinding abrasive wheels;
- drill with a set of drills for metal and a center punch;
- a welding machine, here it is preferable to choose an inverter one, today it is the best choice for beginners;
- hammers of different weights;
- metal files - triangular, round, square, flat;
- magnetic holders - multi-profile, with a mandatory angle of 90 degrees;
- clamps, clamps, clamps;
- a welder's mask and leggings are required for working with hot metal.
The next point is the organization of the workplace, because before you weld the metal door yourself, you need to at least prepare a site for laying out all the elements for fitting. It is ideal to have a mounting table or workbench for this, but you can first prepare a simple flat area on concrete or OSB.
A self-constructed metal door will require the following materials:
- metal profile 20x40 mm - 22-24 running meters;
- sheet metal - 1x2 meters with a thickness of 2.5-2.8 mm;
- door hinges with bearings;
- lock with overhead handles;
- mineral wool to fill the internal volume;
- insulation and material for outer and inner door trim.
Marking and preparation of parts for assembly

When transferring drawings to metal, you need to already clearly understand how a metal door is arranged, which elements require special accuracy, and for which you need to make a gap of 1-2 mm. It is important for the door frame that all parts are made with the smallest deviations, especially if the profile pipe will be butt-welded at 45 degrees cuts.
It is recommended not to cut all the metal into parts at once, as it is easier to get confused. But gradually cutting off the required amount of pipe or corner gives a chance to do everything right.
The first step is to prepare the door frame. Outside tolerances should be no more than 1 cm in relation to the doorway. But the inside must be perfect in all planes.
A metal door with your own hands, the drawings of which are developed taking into account the installation of safe locks with fixation at several points of the block, must necessarily be reinforced with an inner frame made of a profile pipe or corner.
In the process of laying out the details of the door block on the assembly table, the installation location is determined:
- anchor bolts for fixing the unit to the wall;
- door hinges;
- locking holes and fixing the safe mechanism;
Even before welding the hinges to the metal door and connecting the block into a single structure, it is recommended to drill the necessary holes in the profile, and only then proceed to the final assembly.
Assembling the door block
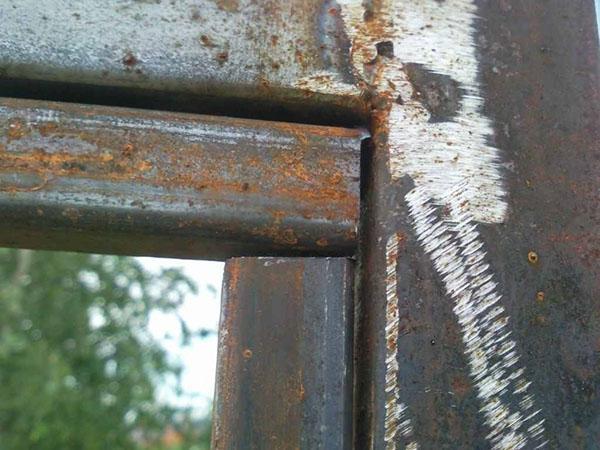
 When creating a metal door with your own hands, assembling the door block and the frame of the door itself have a lot in common. In both cases, this is an assembly of simple rectangles. Assembly technology using welding of joints of shaped pipes at an angle of 45 degrees provides:
- preparation of a profile with pre-cut corners;
- laying out all parts in one plane;
- checking the inner corners of the door block;
- with the help of a few touches of the electrode, the structure is literally caught in one piece;
- using a square, the correctness of right angles is checked, and the inner diagonals are measured with a tape measure;
- the whole structure is welded with a structural seam.
Before welding a door from a profile pipe, a ready-made door block is tried on in place of the opening. Then, with the help of the grinder's grinding and grinding wheels, sagging is removed and beautiful even seams are formed.
Assembling the door frame
Do-it-yourself front door made of metal is welded using the same technology as the door block, with the only difference that its dimensions must be as accurate as possible from the outside of the structure.
 In fact, the door block in this case can be used as a template for laying out parts and fixing the frame before welding.The first step during assembly is the welding of the door hinges. The details are adjusted so that the gap between the block and the door itself is 2-3 mm from above, but the gap needs to be made larger from below - up to 3-5 mm. When using simple garage hinges in the design, they need to be welded on top of the frame and block. For flush-mounted hinges, provide additional space in the door block. For this, it makes sense to make the side of the hinge attachment from a pipe of a larger section. A gap of 5-7mm from the bottom between the door and the block is needed because the armored door is welded by hand from metal 3-4 mm, and the weight of the door over time makes the production in the hinges, gradually lowering the door.
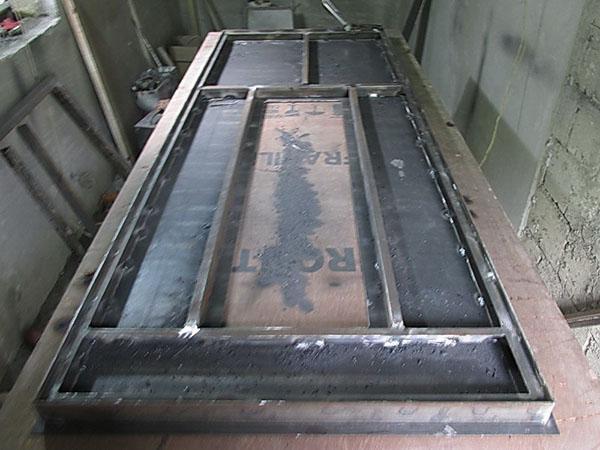
 After welding the hinges and the guide, the door frame itself is welded. The door block is placed horizontally on a flat surface. Using the level, its position is checked. Pipes, cut to size using wooden planks, are laid out level inside the block. The gaps between the door frame and the block are set using wooden wedges or plastic crosses for installing tiles.
Further, as with the block, temporary fixation is carried out with separate points. After checking the corners and diagonals, the final welding of all elements into one piece. After welding the door frame, the entire structure is lifted and checked in an upright position. If the door opens and closes easily, without touching the block, you can start installing internal struts and locks.
When forming the frame, all elements must be fixed in one plane. The metal tends to deform during welding. As a result, do-it-yourself homemade doors made of metal turn out to be curved.
Installing the lock and locking fittings
 In the question of how to weld a metal door with your own hands, there can be no trifles. Especially when it comes to security. The installation of the lock and safe suction must be carried out during the manufacture of the door frame.
Until the frame is sheathed with a metal sheet, it is convenient to make holes in it and install a lock. When placing the lock, it must be borne in mind that an armored door, however, like any other, can be lowered during operation. This means that the locking mechanism should also be placed so that when the door is lowered, it cannot jam.
The gap between the bottom of the lock tongue and the bottom of the hole in the block must be no less than the gap between the door and the threshold of the block. When marking the mounting hole on the door frame, this fact must be taken into account. Alternatively, you can cut an opening in the door frame to fit the lock mounting plate. Then, just make a bar for mounting from a metal strip and weld it into the body from the inside.
The second installation option provides for making a slot in the pipe of the door frame and processing it with a file to the desired size. However, in this case, the lock can interfere with the closing of the door. It simply will not allow the door to close if the gap between the frame and the block is less than 4 mm.
To strengthen the installation site of the lock, it is recommended to weld two horizontal struts into the frame - this will strengthen the structure and will not make it possible to bend the frame during burglary.
Installation of sheet metal
 The final stage in the assembly of the metal structure of the door is the installation of a tight door on the frame. The layout of the sheet is carried out last, when the entire structure is ready.
Before welding the metal door with your own hands into the final design, it is recommended to attach the block to the sheet. Circle it with chalk to visualize how much metal and which side to remove.
When installing the sheet, the outer hinges must also be outlined. Since in the sheet you will need to specially cut openings for them.
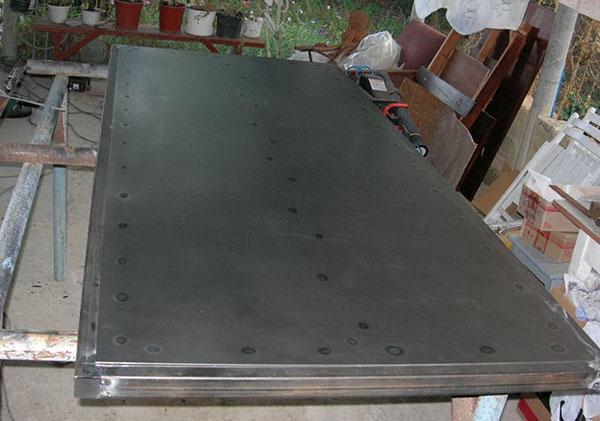
Having adjusted the sheet to size, it is installed on the assembly table and the door frame is placed on top.Welding is carried out in reverse polarity, the fact is that when using a thin metal, it simply begins to deform or in the welding places, a burn-through is formed - a hole in a thin metal. When the polarity is reversed on the inverter, the risk is much less.
 Welding of the sheet and the frame is carried out with thin electrodes with a diameter of 2 or 2.5 mm. Under no circumstances use electrodes with a diameter of 4 or 5 mm. Welding is carried out in one direction - gradually pressing the sheet against the frame. The length of the weld should be no more than 1.5-2 cm. The distance between the seams should be 5-6 cm. When welding a sheet and a pipe, welding is done on both sides of the pipe in a checkerboard pattern.
You can get acquainted in more detail with the order of work and work on individual elements by typing in the search engine - how to make an iron door with your own hands.