Hilling potatoes with a walk-behind tractor
 Hilling potatoes is one of the most labor-intensive processes, especially when it comes to large areas. Manipulation can be done both manually (using hoes, hoes, etc.) and automatically (using a cultivator or walk-behind tractor). In this article we will talk about how to properly hilling potatoes with a walk-behind tractor. Before starting the story, let's dwell on the hilling process itself
How to huddle potatoes correctly?

Three hilling may be needed per season. Let's talk about each in more detail:
- First hilling of potatoes you need to start when the plant reaches a height of 15 cm. Usually this period occurs in the second or third decade of May.
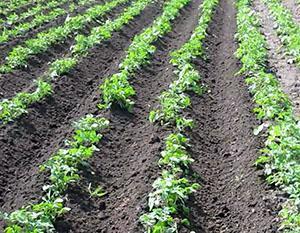
During the first hilling, it is imperative to remember that the layer of soil to be covered should not exceed 10 cm. If this rule is not observed, then the shoots will be very difficult to develop.
- The second hilling of potatoes should be done when the bushes have reached a height of 20-25 cm. As a rule, this moment occurs 1-2 weeks after the first hilling.
- The third and last hilling is carried out not by all gardeners, however, we recommend not to skip this stage. The essence of the process is the same, however, this time the stems should be sprinkled with earth as high as possible.
During hilling, you need to pay attention to the condition of the soil. It should not be too dry or wet. The ideal option is moderately moist soil.
Hilling potatoes with a walk-behind tractor
 The tiller simplifies the process of hilling potatoes by an order of magnitude. For example, a field of several tens of hectares can be manually spud up in a day at best. If you resort to using a walk-behind tractor, then you can do this work in just a few hours. So, let's look at how to properly sprinkle potatoes with a walk-behind tractor.
Before we start talking about the very process of hilling potatoes, let's talk about special structures, due to which the soil is loosened. If someone has ever seen walk-behind tractor, then he already guessed that now we will talk about baking powder and hillers.
 The elements are quite primitive, some experienced gardeners even manage to make potato hillers with their own hands. In total, it is customary to distinguish two types of hillers: plow-shaped, and also disc. Each differs from each other in some characteristics. We will now tell about them.
Hilling potatoes with a walk-behind tractor with a plow-shaped hiller
 To work with a plow hiller, care should be taken to adjust the angle of attack and the depth to which the dive will take place. When this is done, you can start working.
For this, the hiller must be slightly deepened into the ground. In this position, he should be all throughout the entire hilling. If the structure is above the ground during potato processing, it must be lowered. For this, the stand is tilted back. If the opposite occurs, the hiller is strongly immersed in the ground, then the stand must be tilted forward.
Hilling potatoes with a walk-behind tractor with a disc hiller
 To work with the disc variety of the hiller, you need to set two parameters. This is primarily about the distance between the discs. It directly depends on the type of potato and is mainly 40-70 cm.
Then you need to remember to adjust the angle of attack (rotation). It must be the same for both hiller discs.
Hilling process: how it happens
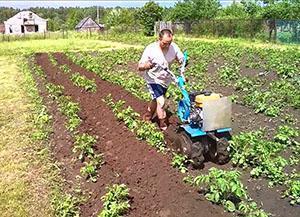
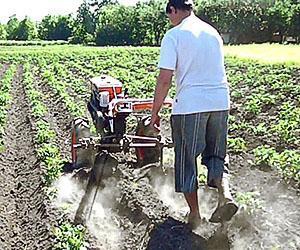
 So, it's time to huddle potatoes with a walk-behind tractor. The first thing to do is to put a few openers in front of the structure. The hiller, which was discussed above, will be located behind. When all the necessary manipulations are done, you can start processing. To do this, the walk-behind tractor is placed strictly in the center between the rows of potatoes and the minimum speed is turned on. The process has started.
 Potatoes are piled up to the end of the ridge, then the walk-behind tractor is carefully unfolded and the next aisles are processed in the same order. According to many gardening experts, you can only spud potatoes with a walk-behind tractor once. During the second treatment of the bushes, there is a high probability that the tubers themselves will be damaged.
If it is decided to spud the potatoes with a walk-behind tractor, then the "correct" planting of the seed must be taken care of in advance. Processing with this technique is possible only if the distance between the rows of plants is approximately 65-70 cm.
As you can see spud potatoes walk-behind tractor is very simple. If you master the principle of work and begin to apply it in practice, the saved time can be spent on solving other important matters.