Planting yoshta: important nuances of rooting a berry bush
 Yoshta is one of the most unpretentious garden plants. However, if you are planting it not as an ornamental, but as a berry bush, it is important to know how yoshta is planted. This culture, in principle, will grow in any place and in any conditions. But to obtain a bountiful harvest and preserve the large size of the berries, the place of cultivation and the peculiarities of the rooting of the seedling are important.
Where is it better to plant yoshta "on berries"
When choosing a place, you should be guided by what the berry loves and what it will be like in adulthood. As a berry, it needs good lighting, so it is necessary to choose a bright area. Otherwise, the berries will be no more than currants, and the ovary itself will also be several times smaller.
Given that the bush can grow up to 2.5 m in height with almost the same crown diameter, do not plant yoshta in the foreground. It will block the light from the rest of the plants, so it's best to give it a background. In addition, if there are several bushes, there should be sufficient distance between them. So the plants will not interfere with each other, and it will be convenient to care for them.
Yoshta can be planted from the second decade of April to the end of May. Autumn planting is also possible, but at least two weeks before the onset of frost. The seedling must have time to take root before the cold weather, otherwise it will not survive the winter.
Planting a Yoshta: Step by Step Guide
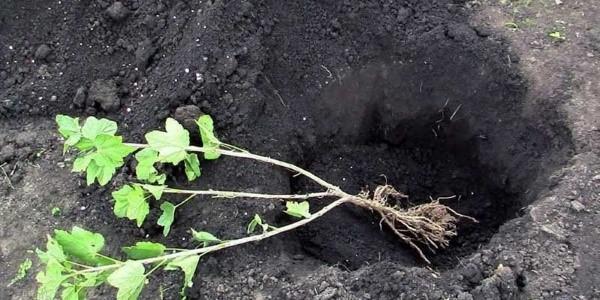
Most often, the culture is bred using seedlings purchased or grown independently. It will be correct to plant yoshta in this way:
- Before planting, all shoots, even if they have leaves, should be cut off, leaving about 10 cm. This is necessary so that the seedling throws all its strength on rooting, and only then on the growth of the aboveground part.
- Soak the bushes (roots) in water overnight.
- Make a clay talker, dip the roots into it and let them dry. Thus, they will receive a kind of protective cap that prevents rapid evaporation of moisture.
- Dig a planting hole deep enough.
- Pour into the bottom of the pit nitroammophos and lightly sprinkle with earth. This will be the starter fertilizer.
- Water the hole and set the bush in the center.
- Cover it with earth so that the seedling goes deeper than before. So it will grow additional roots and begin bearing fruit earlier.
If you plant the yoshta correctly, the shrub will not only delight you with a chic crown. After a couple of years, he will begin to give a bountiful harvest, increasing its amount every year.