DIY built sandbox - recreation area for young children
 Do-it-yourself sandbox for children at the dacha is an excellent solution for exciting leisure. Similarly, you can arrange any free area of the garden or courtyard of a private house. Making with your own hands will allow you not only to significantly save on the purchase, but also to show creative imagination, put your soul into your creation. The dimensions of the sandbox for the playground, drawings and manufacturing features are described in detail in our article.
Varieties of children's sandboxes

The main types of sandboxes:
- standard open sandbox;

- folding;

- with an additional canopy of the "fungus" type;

- thematic building (for boys and girls, universal and combined options);

- sandbox - a boat;

- sandbox in the form of a house;

- machine - sandbox.

You can choose the preferred model of your building not only by gender (for boys or girls), but also depending on the materials used in the construction.
Design and preparation for work
 Making a sandbox with your own hands is not at all difficult, even for a novice master. For these purposes, wood, metal, remnants of building materials (brick, foam and gas blocks) are used, car tires... The size of the sandbox is determined individually, here a lot depends on the capabilities and location, the age group of children, and the preferred design. It is not at all necessary to build a bulky model; most children are willing to play even in a sandbox of the minimum size.
The sand requirements for a children's sandbox are extremely tough. Be sure to use fresh river or sea sand, carefully sifted and free of the slightest traces of debris and dirt.
Many parents also prefer to process it thermally: warm it up in portions in the oven or pour boiling water (potassium permanganate solution, another disinfectant). Such methods will be justified if there are doubts about the quality of the sand, but will take a lot of time to execute.
 Particular attention should be paid to the choice of location. With a sufficiently large area of the site, this will not be difficult. The place for the sandbox should be well warmed up by the sun, be away from trees and main buildings, and be sufficiently protected from drafts. It is also advisable that the children's sandbox is not in direct sunlight in the afternoon. This will save your child from possible sunburn and overheating, because even doctors recommend not to sunbathe in the afternoon.
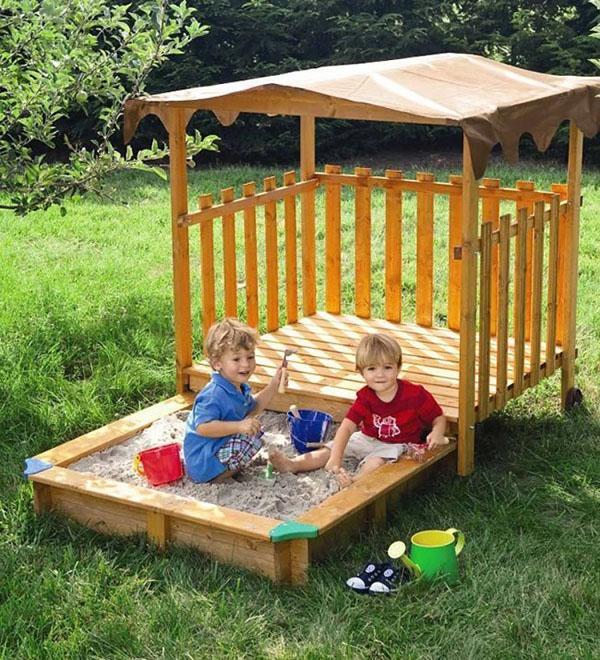
For added convenience, the sandbox can be equipped with a canopy made of any available materials. Traditionally, a wooden roof or awning is used for these purposes. Having decided on the place of the future construction, you can start developing a sketch and selecting materials.
Most parents do not risk leaving small children unattended, and it will be very inconvenient to constantly run around the corner of the house to see your beloved child.That is why it is necessary to provide a place with a suitable view for building a sandbox with your own hands.
Building a simple model
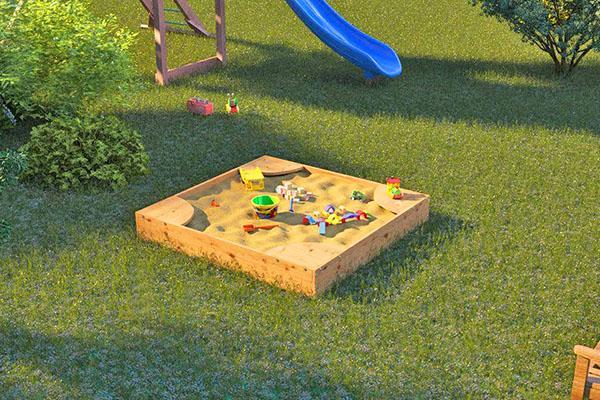
 To complete the simplest model of a children's sandbox with your own hands, you will need a schematic drawing indicating the size of the future play area, materials suitable for construction, and also very little time. Considering the example of the construction of a wooden sandbox made of plywood 1.5 × 1.5 m, several key points can be distinguished.
Important nuances during construction:
- It is necessary to consider whether the future sandbox will have a bottom, or use a previously dug hole for these purposes.
- Using wooden blocks, it is necessary to carefully process them from possible splinters, cover them with an antibacterial primer, and protect the outside with two or three layers of paint.
- A small bench should be provided in the corners of the sandbox. The easiest option is to stuff a triangular piece of board with a secure attachment on the sides.
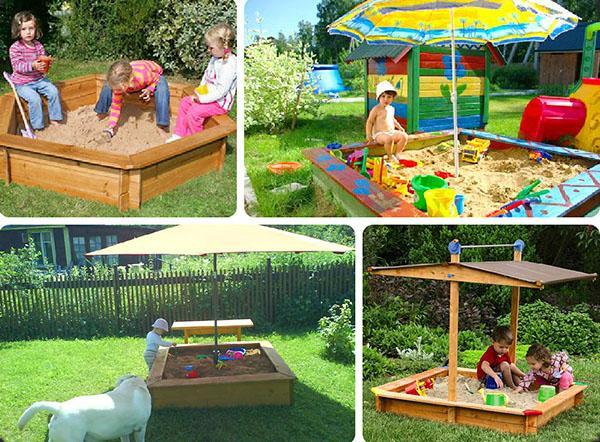
- To protect the child from the sun, a large beach umbrella should be used; sophisticated sandbox models can have an independent canopy, supported in the middle of the sandbox, or in the corners. Such a structure is often called "fungus" among the people. In addition to a sunny shelter, they will reliably protect the child from rain, and the sand inside from debris.
- The sides of the sandbox should not be very high, but at the same time prevent sand scattering outside the structure. Usually, it will be enough to use boards with a height of 20 cm or more.
- For joining the plywood planks with each other and for the additional strength of the structure, a wooden beam with a section of 40 × 40 or 50 × 50 is used.
- All parts in contact with soil and moisture must be treated with antibacterial solutions.
- A sandbox with a canopy with your own hands goes well with other elements of the playground. Examples of good ideas can also be found in the photo.

Build process
Cut boards or plywood sheets are installed on a previously prepared surface, after which they are fastened together. It is important to provide a secure fit, but to prevent possible injury among children. That is why the joints are cleaned and covered with several layers of paint. Sandpit painting should be done with oil, resistant to atmospheric changes, but at the same time safe and non-toxic paint.
A do-it-yourself sandbox made of wood can also be made of timber, wooden pallets, peeled from the bark of tree trunks. An interesting and unconventional option is a do-it-yourself sandbox from pallets. To do this, it is enough to disassemble the pallets. Sand them thoroughly and use to create your own children's corner model. Thin boards are perfect for building an additional cover, as well as for creating a sandbox - a transformer. In it, the protective cover can be easily transformed into comfortable benches for children.
 The log sandbox is assembled as simply as possible. To do this, pre-barked and painted logs are joined together in any convenient way. It remains to prepare the sand, build a protective awning and a cover for the sand.
Instructions for building a sandbox in pictures

Choosing and preparing a place for installing a sandbox.

Laying the frame and bottom of the sandbox.

Making the basis for the benches.

Painting the finished sandbox.
DIY sandbox boat
 This design differs from the previous one exclusively in its configuration. For this you need to estimate the approximate size of the boat. Think over options for additional design (steering wheel, benches for passengers, an interesting awning - sail, additional decor). The advantage of such sandboxes is the relatively simple manufacture, but an effective appearance that will decorate any site. You can get acquainted with the drawings and approximate dimensions of the sandbox - a boat further in the photo.
Sandbox design
 When looking at photos of finished projects on the Internet, you should definitely consider:
- interests of your child;
- the possible number of simultaneously playing children in the sandbox;
- their capabilities.
A sandbox for a boy with his own hands can be made in the form of a boat, a car, a spaceship. Such a performance is sure to please a young traveler. Plus they are simple and easy to make.
Make a sandbox with or without a bottom
 A simple sandbox model involves digging a hole a little deeper (20-25 cm). This option also has significant disadvantages. First of all, the sand will quickly become dirty and lose its original appearance. The second significant minus is the solidity of the structure, which is unacceptable for summer cottages, as well as if it is necessary to transfer the children's corner. An alternative could be the construction of the bottom from a piece of linoleum or several layers of thick film.
Which awning is best
 For structures of small dimensions, it will be easier and cheaper to purchase a beach umbrella, but for complex structures like a boat, as well as large sandboxes, it will be more expedient to make stationary protection. This can be a wooden cover, stretched dense fabric, the use of traditional roofing materials. A similar element can also be played up in the overall design, for example, a stylized house with tiles will look more than appropriate.
Do I need a protective case
 Such a structural element is a prerequisite for maintaining the hygiene of children's games. So that the sand does not get dirty with branches, foliage, debris flown in by the wind, and also does not play the role of a toilet for all neighboring cats, you should definitely consider protecting the sand. The sandbox cover can be made by hand. To do this, it is enough to take a dense fabric around the perimeter of the structure, and also provide for methods of its fastening.
The fabric can be replaced with dense polyethylene, a piece of linoleum, and other flexible building materials.
The popular option, when the sandbox roof is lowered onto the sand, acting as a protective cover, is fraught with additional difficulties. In addition to structural features, it is necessary to provide for a fairly reliable fixation, because children during the game can accidentally knock over the roof on themselves.
How to paint a children's sandbox
 The selected color scheme will perfectly fit into the design of your building and will become an additional decoration of the site. It is advisable to use combinations of bright colors, and choose the paint that is as resistant to fading and safe to use as possible.
Do-it-yourself sandbox for children - an opportunity to quickly and easily organize leisure for children. If your site has enough space to build a play area, you should definitely please the kids.