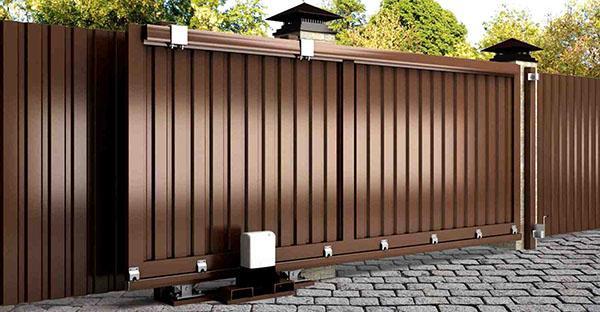
We make simple sliding gates of non-standard width
 Simple sliding gates with your own hands - ideal option for protective structures for giving, a country house or buildings with seasonal living. But it is not always possible to order a product from the manufacturer, and then you have to assemble it yourself.
Read also: 1ha how many m2
The advantages of homemade simple sliding gates
The advantages of self-assembly of such a design include:
- The ability to make simple sliding gates almost any width, having foreseen in advance the features of your site. It often happens that in spring, when the soil thaws and begins to heave, the structure warps. For this reason, gates are usually made no more than 4 meters wide with two leaves to avoid unnecessary deformation. If you need a canvas, for example, 7 meters wide, then you pre-cast the pillars and make the structure resistant to weather changes. This span allows large vehicles to enter the site.
- A budget option. For those who do not want to install a gate with two leaves, and order ready-made sliding doors is expensive (only the cost of an electromechanical gate mechanism is more than 50 thousand), it is quite possible to assemble the structure themselves.
- Low probability of breakage. Lack of electronics allows you to avoid unexpected breakdowns and make repairs cheaper.
Main constituent elements
Consider a 7 meter wide gate with a wicket and a homemade lock. Such gates can be easily opened to any width - 5, 6 or 7 meters.
So that such a large canvas does not lead, it is better to make a jumper above the gate.
Usual furniture castors made of rigid plastic are taken as a movable mechanism. They move along the rail, the depth of the hole for it is 25 cm.
So that the 7-meter canvas of the sliding gate does not stagger in the wind, we make a pin in the middle, resting against the frame or the ground.
It is advisable to make the gates themselves according to the principle of the pivot system ("Farm" used in the construction of railway bridges). It is enough to strengthen the structure of a pipe with a cross section of 40 * 40 mm, the main pillars are suitable 60 * 40 mm, the jumper logs are made from a pipe 20 * 40. It is also recommended to weld around the perimeter with a 40 * 40 pipe. Stiffness corners are allowed to be welded from the remains of the pipe.
When welding a wide structure, it is necessary to create a level work surface, for example, using a boardwalk.
Installation of doors and reinforcement frames
Initially, it is recommended to make a temporary installation - on the posts using tacks.
On the right side, it can be fastened close to the posts with a tack on the top and bottom. But then, on the left, an indentation is necessary, allowing the canvas to move freely without touching other elements. 4 cm is enough.
When preparing the hole, it is necessary to remove the soil by 40 cm, fill in gravel, ASG, pour concrete to the depth of the bayonet-shovel. The ditch is concreted from column to column. A corner is pressed into the still immature concrete.
Please note that goal must walk at an angle from the main fence.
When installing the lock - complete freedom for imagination. However, it must be remembered that it must perform several functions: keep the canvas from opening, prevent the structure from rolling or falling onto a person.
At wide gates, it is necessary to make a pin in the middle of the sash, for example, a bar with a section of 10 * 10, which is included in the square of the pipe 15 * 15. This primitive design adds strength and prevents the canvas from wobbling.
The guide pipes are placed in the ground to a depth of 3 bayonet shovels; it is advisable to make an additional pair of supports.
After attaching the temporary sash to the tack to the posts and concreting the corner and the guide post, the foot with the roller is welded to the sash. After the potholder is cut off, the profiled sheet is sewn onto the frame.
Find out:1 hundred square meters how many meters!