Choosing a thermostat for a home incubator
 Successful incubation of poultry eggs is impossible without stable temperature control. The thermostat for the incubator must provide an accuracy of ± 0.1 ° C, with the possibility of changing it in the range from 35 to 39 ° C. Most of the commercially available digital and analogue instruments meet this requirement. A sufficiently accurate thermostat can be made at home, subject to basic knowledge of electronics and the ability to hold a soldering iron in your hands.
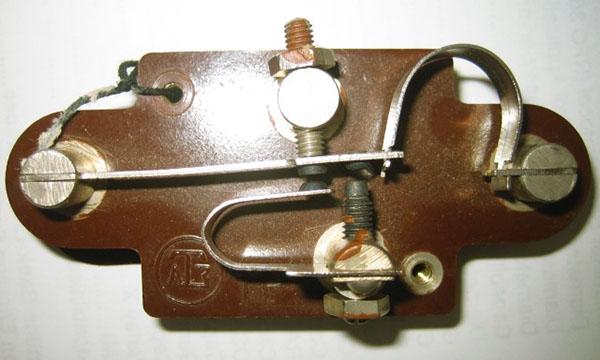
In ancient times…

All positive aspects were canceled out by low resolution and complexity of adjustment. Process temperature incubation it is necessary to reduce it according to the schedule in increments of 0.5 ° C, and it is very problematic to do this with the exact adjusting screw on the relay located inside the incubator. As a rule, the temperature remained constant throughout the entire period of incubation, which led to a decrease in hatchability. The designs with the adjusting knob and graduated scale were more convenient, but the holding accuracy was reduced by ± 1-2 ° C.
The first electronic
 The analog temperature controller for the incubator is somewhat more complicated. Usually this term means a type of control in which the level of the voltage taken from the sensor is directly compared with a reference level. The load is switched on / off in a pulsed mode, depending on the difference in voltage levels. The adjustment accuracy of even simple circuits is in the range of 0.3-0.5 ˚С, and when using operational amplifiers, the accuracy increases to 0.1-0.05 С.
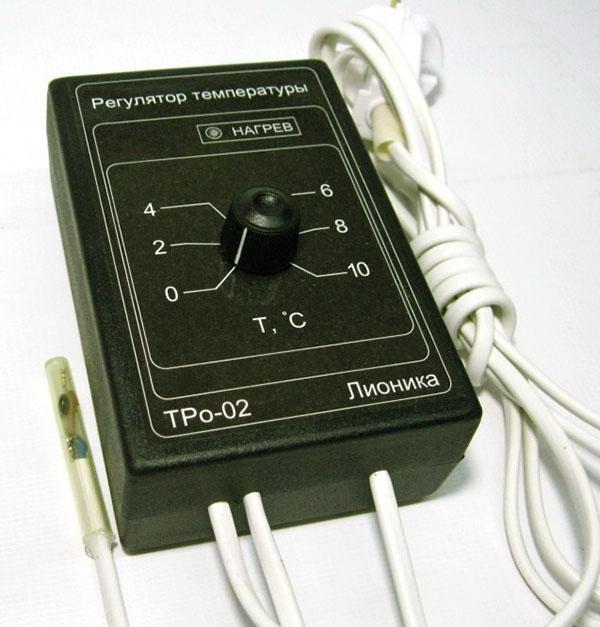
For a rough setting of the required mode, there is a jackal on the body of the device. The stability of the readings is little dependent on the room temperature and line voltage drops. To eliminate the influence of interference, the sensor is connected with a shielded wire of the minimum required length. This category also includes rare models with analog load control. The heating element in them is constantly on, and the temperature is regulated by smoothly changing the power.
A good example is the TRi-02 model - an analog thermostat for an incubator, the price of which does not exceed 1,500 rubles. Since the 90s of the last century, they have been equipped with serial incubators... The device is easy to operate and is completed with a remote sensor with a 1 m cable, a power cord and a meter load wire. Technical specifications:
- Load power at standard mains voltage from 5 to 500 W.
- The adjustment range is 36-41˚С with an accuracy not worse than ± 0.1˚С.
- Ambient temperature from 15 to 35˚С, permissible humidity up to 80%.
- Contactless triac load switching.
- Overall dimensions of the case are 120x80x50 mm.
In numbers it is always more accurate
 Digital measuring instruments provide high accuracy of adjustment.The classic digital incubator thermostat differs from the analogue in the way of signal processing. The voltage removed from the sensor passes through the analog-to-digital converter (ADC) and only then enters the comparison unit. The initially set digital value of the required temperature is compared with that obtained from the sensor, and a corresponding command is sent to the control device.
Such a structure significantly improves the measurement accuracy, minimally depending on the ambient temperature and interference. Stability and sensitivity are usually limited by the capabilities of the sensor itself and the capacity of the system. The digital signal allows you to display the value of the current temperature on an LED or liquid crystal display without complicating the circuitry. A significant part of industrial models have advanced functionality, which we will consider using the example of several modern devices.
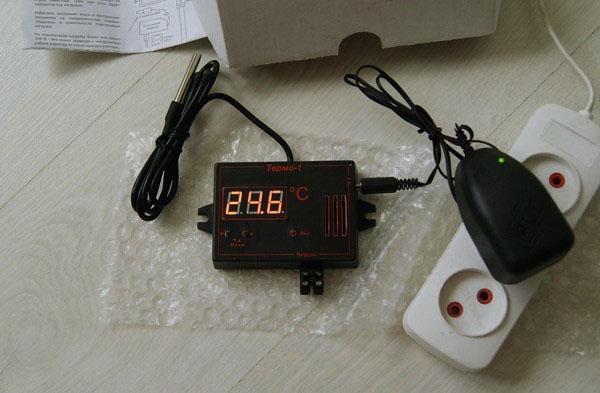
The capabilities of the Ringder THC-220 budget digital thermostat are quite enough for a homemade incubator. Temperature control in the range of 16-42 внешнийС and an external block of outlets for connecting the load allows the device to be used in the off-season, for example, to control the room climate.
For review, we present brief characteristics of the device:
- The current temperature and humidity in the area of the sensor are indicated on the LCD.
- The range of the indicated temperature is from -40˚C to 100˚C, humidity is 0-99%.
- The selected modes are displayed on the screen as symbols.
- Temperature setting step 0.1˚С.
- Humidity regulation up to 99%.
- 24 hour timer format with day / night division.
- Loading capacity of one channel is 1200 W.
- The accuracy of maintaining the temperature in large rooms is ± 1˚С.
A more complex and expensive design is the XM-18 universal controller. The device is produced on the territory of the PRC, and comes to the Russian market in two versions - with an English and a Chinese interface. The export option for Western Europe is naturally preferable when choosing.
 Mastering the device will not take much time. Depending on what temperature should be in the incubator, you can adjust the factory program using 4 keys. On 4 screens of the front panel, the current values of temperature, humidity and additional operating parameters are displayed. Active modes are indicated by 7 LEDs. Sound and light alarm in case of dangerous deviations greatly facilitates control. Device capabilities:
- The working temperature range is 0-40.5˚С with an accuracy of ± 0.1˚С.
- Humidity control 0-99% with an accuracy of ± 5%.
- The maximum load on the heater channel is 1760 W.
- Maximum load on channels of humidity, motors and alarm no more than 220 W.
- Egg turning interval 0-999 min.
- Cooling fan operating time 0-999 sec. with an interval between periods 0-999 min.
- The admissible room temperature is -10 to + 60˚С, relative humidity is not more than 85%.
When choosing thermostats with an air temperature sensor for an incubator, consider the possibilities of your design. A small incubator with a head will have enough temperature and humidity control, and most of the additional options of expensive equipment will remain unclaimed.
Thermostat - do it yourself
Despite the large selection of finished products, many people prefer to assemble a thermostat circuit for an incubator with their own hands. The simplest version below was one of the most widespread amateur radio designs in the 1980s. Simple assembly and affordable element base outweighed the drawbacks - dependence on room temperature and instability to network interference.
Amateur radio circuits based on operational amplifiers often outperformed their industrial counterparts in performance.One of such schemes, assembled on the KR140UD6 OS, can be repeated even by beginners. All details are found in household radio equipment at the end of the last century. With serviceable elements, the circuit starts working immediately and only needs calibration. If desired, you can find similar solutions on other op amps.
Now more and more circuits are made on PIC-controllers - programmable microcircuits whose functions are changed by firmware. The thermostats made on them are distinguished by simple circuitry, in terms of functionality they are not inferior to the best industrial designs. The diagram below is for illustration purposes only, as it requires the corresponding firmware. If you have a programmer, it is easy to download ready-made solutions along with the firmware code on the amateur radio forums.
The speed of the regulator's response directly depends on the mass of the temperature sensor, because an overly massive body has a lot of inertia. You can “coarse” the sensitivity of a miniature thermistor or diode by putting on a piece of plastic cambric. Sometimes it is filled with epoxy for tightness. For single-row, top-heated designs, it is best to place the sensor directly above the surface of the eggs at an equal distance from the heating elements.
Incubation is not only profitable, but also exciting. Combined with technical creativity, for many it becomes a lifelong hobby. Do not be afraid to experiment and we wish you successful implementation of your projects!